Blender 3D: Noob to Pro/Quickie Texture
Textures are laid on top of materials to give them complicated colors and other effects. An object is covered with a material, which might contain several textures: An image texture of stone, a texture to make the stone look bumpy, and a texture to make the stone deform in different ways.
A texture may be an image or a computed function. What the texture does and how it is mapped onto your object is set in the material buttons. Some commonly used texture types are shown on the page Using Textures.
This tutorial uses the file from the Quickie Material tutorial. If you didn't do it before, go back and do it now.
Making It Mottled
Step 1: Adding Texture to the Material
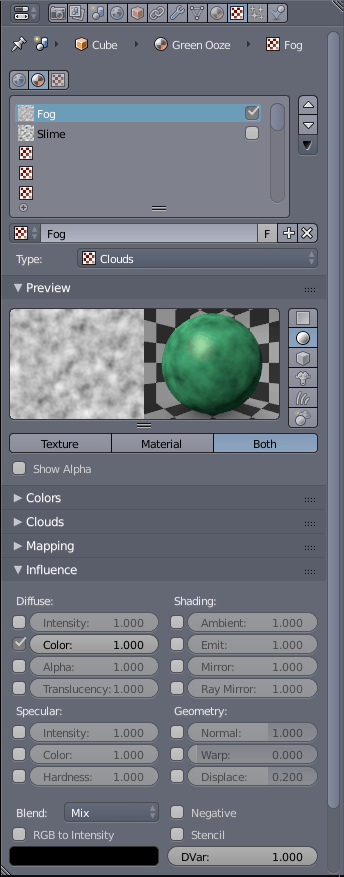
- In a Properties window, switch to Texture
 context.
 - A default texture, Tex, should already be available and set to Type: None.
- If not, click one of the Texture Slots (the ones with chequered icons) and click the New button.
- Set the Type to Clouds.
- The Texture Preview panel will now reflect this change. However, said change will not be reflected in the 3D view window.
- You can do a quick render (F12) to see the change. However, you'll have to re-render every time you change a setting to see its effect.
- Otherwise you can click the Material button in the Texture Preview panel to see the changes to the material. (Click Both to see them side-by-side.)
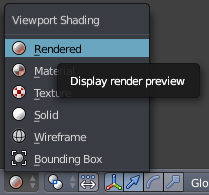
- A better, albeit more resource intensive option would be to change the Display Mode to Rendered. (Shift+Z in the 3D view window or Selecting the Display mode from the 3D view Header.
Step 2: Refining the Texture
- Once you use one of the ways to preview your work, you'll see Green and Magenta mixed in resembling a polished granite texture.
- This is the default colour for any generated texture. Now all you have to do is change it to black.
- But before that scroll down to the Mapping panel and make sure that Coordinates is set to Generated, Global or Object (for best results).
- Scroll down to the Influence panel, and click on the colour swatch and drag the reticule in the bar to the right all the way down.
- Now the texture should look more or less like green granite
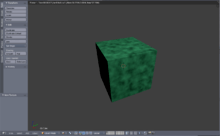 Render result in 3D view.
Making It Bumpy
Step 1: Adding a second Texture to the Material
- In a Properties window, switch to Texture context.
- The Cloud texture you just created will be listed in a slot.
- To create an additional texture click a second texture slot and then click New button.
- Change the texture Type to Stucci.
- Now if you preview this texture you'll only notice a bit of magenta mixed in with the previous texture.
Step 2: Making the texture a Bump-Map
- Scroll down to the Mapping panel and make sure the Coordinates is set to Generated, Global or Object for best results.
- Scroll down to Influence panel uncheck Color and check Normal under Geometry, then set it to 4.
- If required, set the Method under Bump Mapping to a higher Quality.
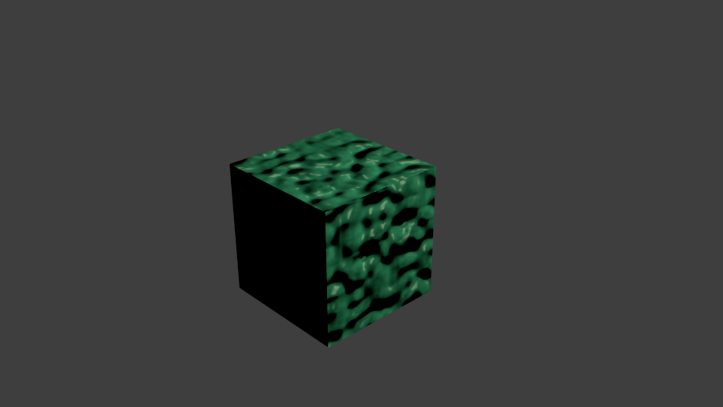
The render result should look like the one on the right.
Now mess around with the various settings we discussed, Particularly the settings in Clouds/Stucci, Mapping and Influence panels. Also try the whole tutorial (Quickie Material & Quickie Texture) with a sphere and other shapes.
Some Closing words
The downside of bump-mapping, as you may have noticed, is that it only provides an illusion of depth/bumpiness. The edges will still be straight as in the render. For curved surfaces the outline will still look spotless while the centre looks deformed, plus shadows will still render smooth compromising the illusion. An alternative technique is displacement-mapping which actually deforms the mesh as per a texture to produce depth in the mesh, with the downside of creating a higher poly mesh.
With bump-mapping in general, you will get a greater effect on smoothly curved surfaces with high specularity as compared to flat surfaces with low specularity.