Blender 3D: Noob to Pro/Modeling Realistically
Everyone who starts a new career or hobby in 3D Modeling also seems to look around their immediate environment for things to model. Things like your computer monitor, your keyboard, and even the desktop which they are resting are all common "first models." Developing an eye for geometry takes time and this is a great chance to practice.
For this tips and techniques discussion, I'll start with the concepts of furniture and walls, but the ideas really extend to anything and everything you can model in Blender, from spaceships to fantasy demon-women, from your barbecue deck blueprints to biologically accurate squids.
Assemble Things, Don't Chisel Them
Let's start with the furniture around you.
You may think it's easy to model your desk using a couple of boolean operations on cubes. But it rarely comes out looking quite right. It seems like such a good idea at first. Then you find that the drawers won't open realistically. The corners are all amazingly sharp and crisp. The writing surface seems to be at the wrong scale for thickness. The woodgrain goes in the same direction everywhere. You then realize it will be hard to bevel just the few edges that need beveling. The more you look at it, even with good render settings, the more it looks like dollhouse furniture instead of a real life, full size desk.
Real furniture is not chiseled out of a half-ton cube of mahogany, because trees don't grow that thick, and it's a real waste to chip out the spaces for drawers. Instead, cabinetmakers tend to assemble a piece of furniture from many component parts. Think of those "self-assembly" kits from the local superstore, or even the showroom examples from a nearby unfinished knotty pine store.
Model several kinds of boards and fittings, then copy and assemble them appropriately. You don't need to model every nail and dowel, and you don't even need to know what a dovetail joint is. But you can make realistic furniture when you build things from their natural components.
- Cut lumber in a variety of sizes and thicknesses.
- Measure real example furniture and take note of the construction details.
- Choose varying woodgrains by duplicating materials and adjusting them to be more individual.
- Align those woodgrains or other materials in an appropriate direction and scale for the model.
- Bevel just the parts or edges which are naturally worn or intentionally beveled.
- Any cloth, glass or metal fittings are separate components using their own materials.
- Create an "Empty" type object, give it a descriptive name, and parent all of the pieces to it.
There are a couple more benefits to this form of component modeling:
- Working with things made from multiple real materials is easier: one object, one material.
- The model is more flexible, because they can be reconfigured to other styles more easily.
- Components come in handy for other models: adapt a desk's drawers in kitchen cabinets and bedroom furniture.
Separate Objects for each Material
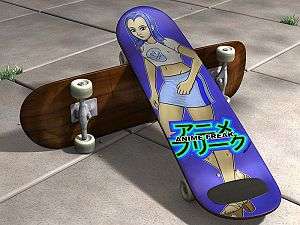
A common question for new modelers is how to make one mesh that uses more than one material. For example, a skateboard with metal trucks, rubber tires, and a wooden deck. While Blender does provide an interface to allow such a combination, it is not usually the best approach for modeling realistically.
If you model the skateboard as separate parts, based on the way different real parts are assembled, then you have a lot more control over the final model. You can replace the wheels or use trucks of different styles later. You can adjust the mesh that defines the shape of the deck, without having to re-assign the areas that should be one material or the other. And lastly, you can choose to use subsurface tricks on the various parts, while avoiding them on other parts. Even if the whole model needs subsurfaces, it becomes a bit hard to control where one material starts, and another material ends.
Removing the Fourth Wall
Just as with furniture, you may model your first building interior as a hollowed-out cube. It seems straightforward to make a big cube, turn it inside out, and call it a living room. There are a lot of drawbacks to working with a room that was carved out of a single chunk of solid rock.
Buildings and rooms are assembled from parts. Just like the furniture modeling tip, design your rooms as a collection of separate pieces.
- You don't need to measure out the internal beams and joists, but remember they're there.
- Each interior or exterior wall should be its own object or assembly.
- Take care to note the correct dimensions and placement of doorways, windows, ceiling.
The benefits of a component-modeled interior include:
- Easier to see inside, just hide some walls on a different layer.
- Walls are much easier to move around to reconfigure the room layout.
- The same modeling work on one area can be copied to other rooms more easily.
- A more realistic architecture with consistent scaling is achieved quickly.
Proportions and Measurements
For realism, it's vitally important to get the right proportions for familiar objects. If your audience sees a bookshelf with 5" thick shelves, or a human hand which has a 5" long thumb, their brain is going to tell them that something is wrong. They might not be able to decide why, but they'll tell you it looks fake.
Even when you're animating fantasy characters, you should develop an understanding for proportion. Many cartoon characters have very large heads when compared to their bodies; this allows room for greater expression and makes the characters seem younger. Deciding how many "heads high" each character should appear will ensure that your figures all maintain proper proportions to each other and to their environment.

To get good proportions, you need to think about measurements.
- Grab a ruler or find some existing blueprints.
- Think in terms of those measurements for the duration of the project.
- Choose a base scale that will let you work comfortably within a 500x500x500 unit volume.
- Blender limits cameras to 1000 unit distances, for better numerical accuracy.
You can mix and match base units, by using Empty objects as parents. For example, you can model your furniture in inches or centimeters, and model your house in feet or meters. Then when you append your bed.blend's objects, just parent that bed to a new Empty object, and scale the Empty. This will conveniently scale all of the separate component pieces of the object together.
There's only one big wrinkle with working with multiple scales: materials should be designed with a certain base scale in mind. Many material surface properties are scaled according to the units you choose for a given object, or the world units. Just consider this as you design, and check your work critically.