Blender 3D: Noob to Pro/Furry
There is an older version of this page created with Blender v2.40.
(NOTE: New: marks
Notes added for newer versions. I'm not an expert but they seem to work.)
This tutorial deals with fur, i.e. lots of relatively short hairs covering a body. We will use particles to create the fur, and discuss a few aspects here:
- How to determine the length and the thickness of the hair.
- How to determine the place to grow the hair.
- How to color hair.
- How to render efficiently.
The particle system is far too complex to show more than one method in this tutorial. You can achieve many of the same effects shown here in different ways.
The emitter
- Remove the cube.
- Add an UVSphere. This will become our emitter.
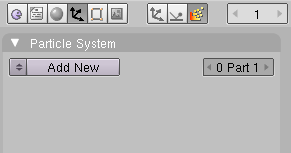
- Change to the Particle buttons in the Object buttons (Fig. 2a). New: looks like
 in newer versions.
 - Click on Add New. New: Click on
 in newer versions.
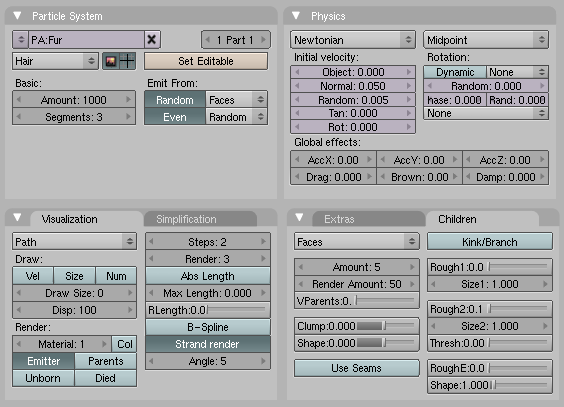
 - Rename the particle system to "Fur".
- Change the particle system type to Hair.
A Hair particle system has a lot of specialties, the most important thing is that we can edit the particle "motion" by hand if we want to. Apart from that normal particle physics apply, so everything a particle does hair can do also and vice versa. A particle hair shows the way of the particle during it's lifetime at once. To do that efficiently not every single frame is rendered as a point, but a certain number of control points are calculated. Between these control points there will be drawn an interpolated path. The number of control points is the number of segments + 1.
For fur you need lot's of particles, like 1.000.000 upwards. This will hurt us badly if we have to deal with so many particles in the 3D window and want to render it. Therefore we will create the great amount of particles with so called "children", that mimic the behavior of their parents. The amount of particle parents should be as low as possible, but you need a certain amount to control the distribution of the hair. We will also use as little control points as possible, three segments should be enough for short fur.
- Set the Amount to 1000.
- Set the number of Segments to three. New I can't find this in 2.69. New2 In 2.7x, it's right next to the particle system type you just chose (emitter or hair), below the slider Seed.
- Emit from: New I can't find this in 2.69. New2 In 2.7x, you must check the Advance box near the Segments slider in order to see it.
- Random:Faces
- Even :Random
This will create a nice, uniform distribution.
Let the hair grow - the hair shows the path of the particle:
- Set Normal to 0.05. New: Hair Length under Emission. New2 In 2.7x, you must check the Advance box in order to see the Velocity panel and adjust the Normal and Random slider. If you change the Normal value, Hair Length will set itself to 0.2.
- Random 0.005
Nothing special here: the hair grows in the direction of the face normals. Length and direction are a bit randomized.
The Visualization type changes automatically to type Path if you select a hair particle system. If you would render now, you couldn't see the emitter object any more.
- Activate Emitter in the Visualization panel. New: In the Render panel.
- Activate Strand Render. New: In the Render panel.
The Strand Render (which I have baptized keypoint strands to differentiate from the "normal" polygon strands) renders the hair strands extremely efficiently and magnitudes faster than the normal strand. It is the only way to handle many hairs in terms of memory consumption. But it has a few disadvantages:
- - They are not seen by raytracing, so you don't get raytracing reflections and no raytracing shadows. You can use environment mapping to compute the reflections and Spot Lamps with buffer shadows for the shadow.
- - If the hair is very thick (like 1 BU) sometimes the shape is not correct.
- Activate Children from Faces. New: I chose Interpolated under Children. Interpolated is known to give better results when making Fur. Simple, maybe, will work with one color, but we're going to use 2 colors from an image.
- Amount: 5 This is the amount of children particles for each parent.
- Render Amount: 50 This is the amount of particles during the render.
- Rough 2: 0.1 New: I used Roughness > Random for this setting. Random variation of the shape of the particles. So the hairs will not stand plain upright and appear a bit curly.
The parent particles are not rendered by default, so now we have 5.000 Particles that render on my old machine in 6 seconds. If we use 1.000 children we have 1.000.000 particles, that need approx. 1 GB of RAM and render in 1:42 minutes. If you render keypoint strands with Children from Faces you can also use Child simplification, which will reduce the amount of particles on objects far away from the camera automatically. New: Don't see this when using Children - Simple, When using Children - Interpolated, you'll see it all down the Render section. However, the result is very bad, with the standard settings.
Now we should change the lighting to get a preview.
- Select the lamp.
- Change to the Lamp buttons.
- Change the lamp type to Spot.
- Change the shadow type to Buf. Shadow
- Change the buffered shadow type to Classic-Halfway.
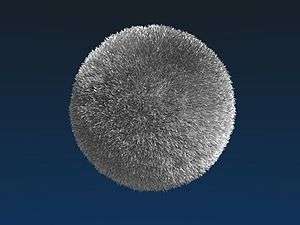
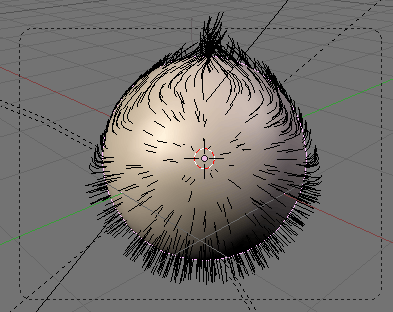
This is a great shadow type that renders keypoint strands very well and creates fewer artifacts than Classical (In my opinion). I have inserted two other lamps and used a classical three point lighting for the first rendering (Fig. 2c).
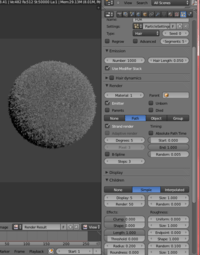
NEW:
Here are the settings I used and the render result I got. (Click to enlarge the image and read the settings.)
Material
In the material buttons you can set different aspects for the strands:
- - their width and form
- - the used shader
- - the base color
- - a texture along the strand
- - different particle attributes like length, density or roughness
- Add a material to the emitter.
- Name the material "Fur".
Strands Shader
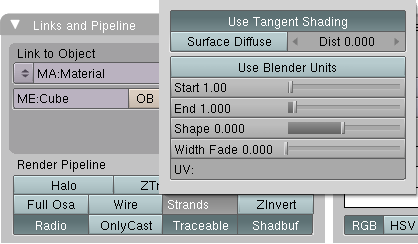
The default strands settings for Keypoint strands are shown in Fig. 3a. Take a look in the Manual about Strands for an explanation of all settings.
- Change the End value to 0.25, this will make the hair more spiky (not shown in Fig. 3a). New In 2.7x, it's called Tip (and Start has become Root)
| |
Surface Diffuse: It might be easier to achieve a good lighting environment if you check Surface Diffuse. With Surface Diffuse turned on, hair does not show as many highlights, which may be too bright without it. I've seen many great examples of fur that use this parameter. However, you have to decide right at the beginning whether you want to use it because it affects all the other material settings. This is something you have to decide for yourself. |
Giving the hair its base color
Strands are rendered with the material of the underlying face/vertex, including shading with an UV-Texture. Since you can assign more than one material to each face, each particle system may have its own material and the material of the underlying face can be different from the material of the strands. We will use an UV texture and use it for the surface of the emitter as well as for the color of the hair.
- Change to Front view in the 3D window (View->Front).
- Make sure you are in Orthographic view mode (also in the View menu).
- Change to Edit mode of the sphere.
- Press U to unwrap, select Sphere from View. This is a quick and well working method to correctly unwrap a sphere the easy way.
You don't need to assign a texture in the UV/Image Editor, we only need the coordinates now.
- Add a texture to the material, name it "FurColor".
- Set Map Input to UV.
- Go to the Texture Buttons and set Texture-Type: Image.
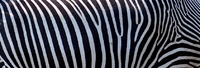
- Load an image texture. I have used the image in Fig. 3b.
Normally I would just stop here, I think the material is good enough. But if you want to make the fur more fluffy and soft, you should a second texture along the strand, which changes the alpha value. New: For this to work you have to choose Interpolated instead of Simple in the Children panel of the particle system.
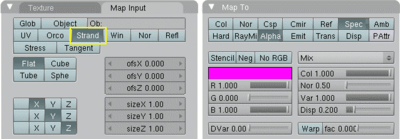
If you want to do that:
- Activate ZTransp.
- Add a second texture.
- Map Input: Strand
- Map To: Alpha and Spec, DVar=0
- Use a blend texture (Linear or Quad)
You can change all other properties this way, for example the color along the strand (bleached tips).
Changing Hair length with a texture
At first I will show you how to render the emitter mesh with a different material than the strands. Then I will show how to change the length of the hair with a texture semi-interactively.
- Change to the Editing Buttons.
- Change to Edit mode.
- In the Links and Materials panel click on New in the material section (see Figure 4a).
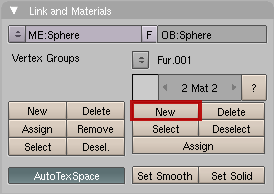 Figure 4a: Button to click
 - Make sure all vertices are selected.
- Click on Assign.
- Change back to Object mode.
Now the emitter bears a second material.
- Return to the material buttons.
- In the Links and Pipeline panel click on the X next to the material name (Deletes link to this Datablock).
- Add a new material.
- Name it Emitter.
Now you have a new material on your emitter object. Since the particle system uses material no. 1 you can use different settings for the emitter.
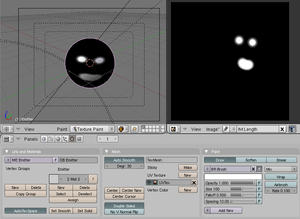
We have already unwrapped the emitter, this is something that will probably be the case also for any real models. Now we will use an UV-Image and texture painting to determine the hair length.
- Split the 3D window.
- Change the right hand side to an UV/Image-Editor window.
- Change to edit mode of the emitter object.
- In the UV/Image-Editor use Image->New... and confirm the default settings. This will create a new image, that we will paint on.
- Click on the package icon in the windows header of the UV/Image-Editor window. Confirm.
- Change the object to Texture Paint mode. Noob Note: In the 3D Window, click on the drop down menu. Change it to Texture Paint.
Now you see the texture on the object.
- Paint a structure on the object.
- Change back to object mode.
- Go to the Material buttons.
- Change the active material to Fur (click on the arrows in the Links and Pipeline buttons where it reads 2 Mat 2).
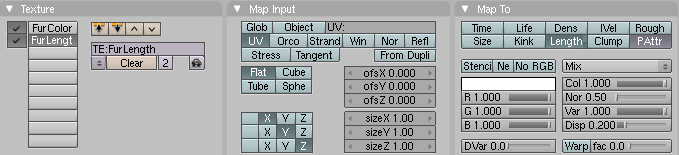
- Create another texture. Name it FurLength.
- Set Map Input to UV.
- Set Map To
- Turn Col off.
- PAttr
- Length
- DVar=0 All the white areas on the texture will produce a particle length of 0.
- Load the image texture that we have painted.
The result is shown in Fig. 4d, you can also see the particles change in the 3D window.
New In Blender 2.7x, things have changed. I followed until the step Change the active material to Fur. Then, I went to the Texture tab and clicked on the Particles Texture button next to the Material Texture button (or you can click on the Particles tab button ![]() and then click on the Texture tab button). I added a new texture, opened the one I had just painted in the UV/Image-Editor, set Coordinates to UV (in the Mapping panel). Finally, I enabled Density in the Influence panel and set its value to -1.00 (1.00 has the opposite effect = hair on the white areas of the texture). The result should be the same as above.
and then click on the Texture tab button). I added a new texture, opened the one I had just painted in the UV/Image-Editor, set Coordinates to UV (in the Mapping panel). Finally, I enabled Density in the Influence panel and set its value to -1.00 (1.00 has the opposite effect = hair on the white areas of the texture). The result should be the same as above.
There would have been other ways to achieve this result, e.g. with vertex groups or with particle editing. But I like to work with textures, because you have very fine control and may change the strength of the effect at any time. Vertex groups don't allow for such fine control or you need very many vertices in the emitter. Particle editing (what we will do in the next step) is lost if you change the base particle settings late on, and you can't change it's effect so easily.
Comb it!
An effect that is often underestimated is the importance to comb fur in the natural directions. Fur doesn't simply stand upright, and it also doesn't follow gravity (or only to a small amount). So back to the particle system!
- Change back to the Particle buttons.
- Click on Set Editable in the Particle System panel.
- Change to Particle Mode.
Particle Mode only appears if you have made the particle system editable, and only hair systems can be made editable. There are a few lifesavers to know when working in Particle Mode.
- - you can edit only the control points (remember the setting Segments from the beginning of this tutorial)
- - you can only edit parent particles, so you need enough parents for good control
- Activate Limit selection to visible
- Activate Point select mode for even finer control.
Both settings are in the window header of the 3D window.
- Open the Particle Edit Properties panel with N key in the 3D window.
- Select Comb.
You have quite a few different tools at hand in Particle Mode, see the manual on Particle Mode.
- Comb the hair following the natural flow.
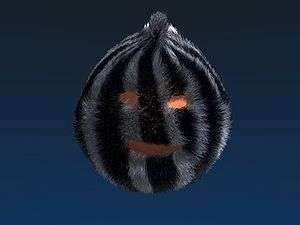
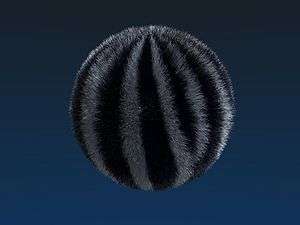
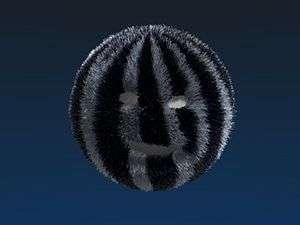
On the example sphere I have used here it is a bit difficult to tell what the natural flow should be ;-). So I have just very carefully combed and changed the length at a few places a bit. You find the rendered result in Fig. 1, the Blend file is linked below.
Links
- A tutorial in German that shows how to create Grass with a very similar method.
- Awesome fur shown here: Tiger