Blender 3D: Noob to Pro/Flying Through A Canyon
Creating the Canyon
Forming from Textures
- Open up a new Blender file and erase the default cube with X
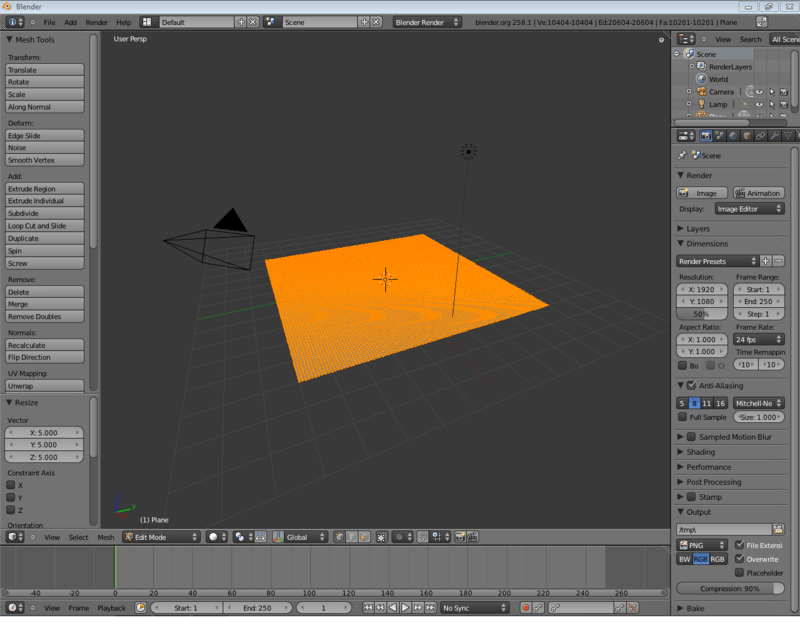
- Add a grid and change the subdivisions to 100 for both X and Y.
- Scale the canyon up to 5 times its current size
(Do this by either hitting S and typing in 5, or hitting S while holding CTRL to snap and scale your mesh 5 times.
At this point your mesh should look like something like the picture below.
Texturing, Shading, and Deforming Your Mesh
- Go to the Texture tab next to the Materials, and click New.
- This texture will be used to create our canyon, so give it an appropriate name. In this tutorial, "Canyon" was used.
- Select the Texture Type to be Wood
- If there is a Checkbox next to "Canyon" in the Texture tab, uncheck it.
We will now displace the vertices based on the texture.
- Click on the Modifiers tab on the Properties panel (spanner icon).
- Click the Add Modifier pop-up menu and select "Displace".
- Select your "Canyon" texture for the displacement.
- Go into Object Mode. Notice that the vertices have been displaced! (To see the results better, make sure you're in Solid Mode) However, the material is very jagged. This is because Blender is preserving the original faces on the underlying material, and the original faces don't run in the same direction as the grooves the wood material has created.
Noob Note: This will also work with an image texture, i.e. using an image as a texture. Tested using NASA's Blue marble topographic pictures. Go to the end of this tutorial for additional projects.
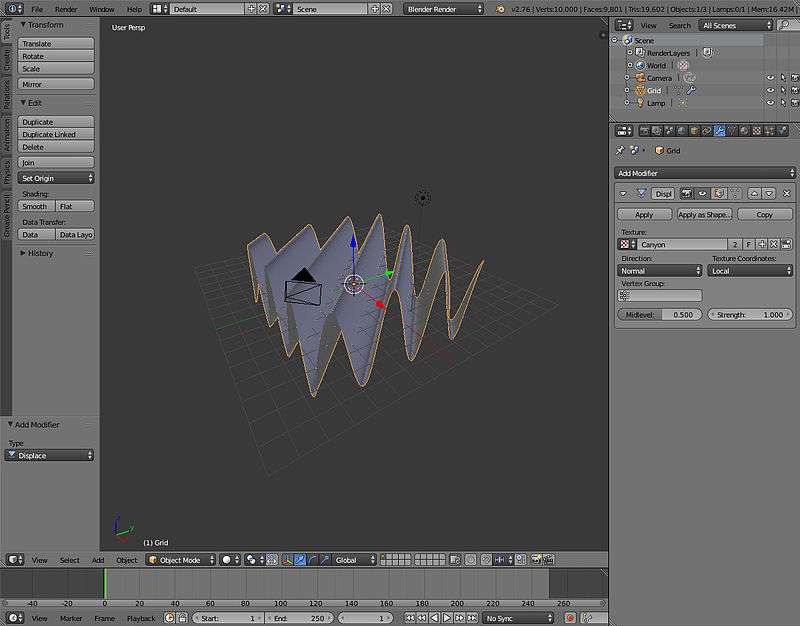
Your Mesh should now look something like the picture below.
Improving the Look
Now to make the canyon more interesting:
- Go back to the textures tab, under the Wood tab deselect Bands and select RingNoise. Keep the default options for the moment.
- You will now see a "rippling" texture. But it isn't a canyon yet.
Note: If you go into Edit mode (Tab), and select all vertices, then scale to 0.2 of the original size. after this should leave Edit Mode into Object Mode, and scale the Object (as a whole) up to 10.0 of the size. What will occur is that you'll pack the vertices closer to each other, but not the texture. Then, you would have taken the object as a whole (including the Texture) and up-scaled it. This is the difference between Scale in Edit Mode and Scale in Object Mode. Don't do it!
- You should now have a semi-boring canyon, but it does have circuits which the camera can float around in.
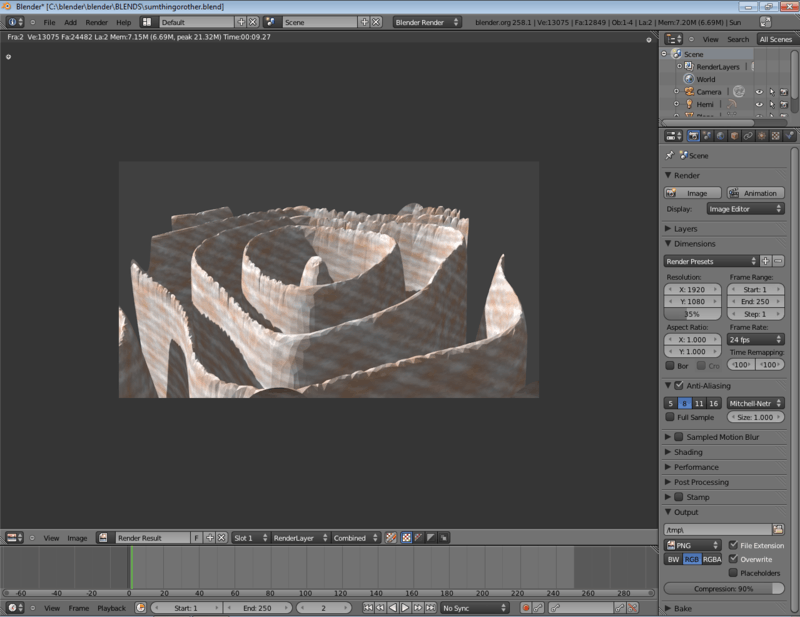
- To make the Canyon more interesting, play around with the Texture values for Wood. I chose the values Noise Size: 1.0 and Turbulence: 15.00 as they produced a somewhat interesting outer ring.
- You may also want to play around the Deform modifier settings, especially Strength which changes the strength of the deformations.
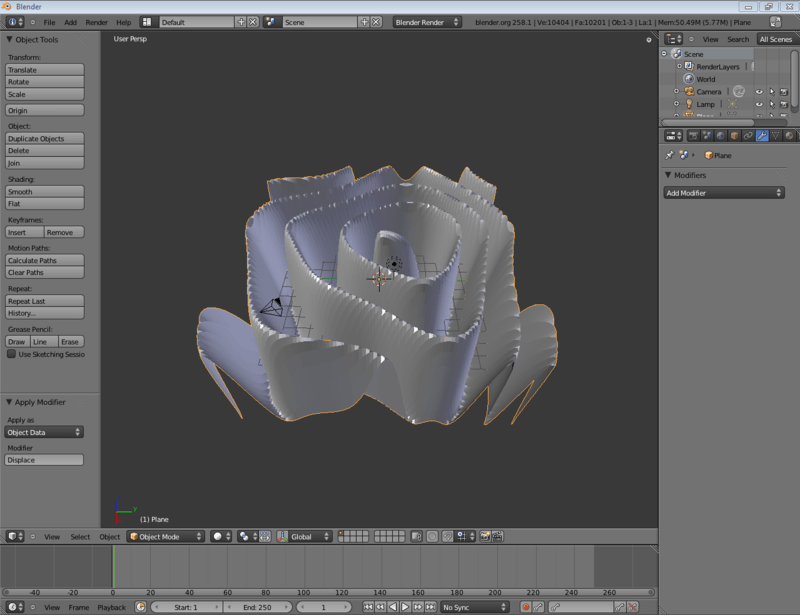
- When you are happy with your mesh, press the Apply button under the Deform modifier.
- The displacements are now permanently baked into the Mesh, and the result should be something like the picture below.
Eliminating the Unneeded
- We will now reduce the number of vertices. Go into Modifiers, and add Decimate. The mesh will appear to change slightly, but it hasn't, except that 4-vertices faces have been triangulated
- Add another Modifer, Sub Surf, and make sure that the Levels is just 1
- Under the Decimate, slowly reduce the ratio and watch the Mesh. Very tiny mesh details will be changed but the Decimate modifier will keep the shape while reducing vertices.
- I got to 0.07 on my mesh before I decided the detail was getting too low. Remember you will be flying through the canyon, not over it, so the detail on the walls of the canyon is more important.
- Hit apply to bake the reduced vertice count into the Mesh. Smaller vertice counts will make rendering faster.
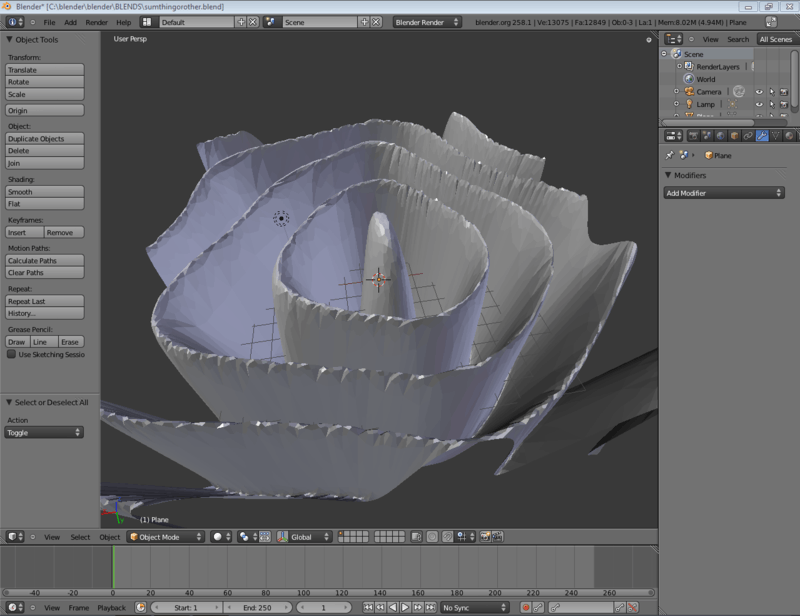
- Increase the number of levels on your Sub Surf modifer and take a good look, you have just created a canyon! You may reduce the levels or remove the Sub Surf entirely afterwards.
Coloring the Canyon
A Rocky Material
This is one method to create a rocky wall. The result isn't particularly realistic but it is easy to make. Creating materials is a difficult practice, and the first step is to know what you're trying to recreate, perhaps by using actual photographs.
- Create a new material for the cliff
- In the Specular panel under the Materials tab, set the Intensity value to 0.132 (our cliff isn't particularly shiny) and Hardness to 20.
- Under the Textures tab, add a new texture in the first slot.
- Give this texture the Marble texture type. Under the Marble options, select Hard and set the Noise Depth to 1 and Turbulence to 1.7.
- Under the Colors tab, activate Ramp. The first colorstop should be white with an alpha of 0, leave the second as it is.
- This is meant to give our primitive rock a textured appearance
- In the second texture slot, add another texture.
- Set this type to Clouds, under the Mapping options set the X, Y, and Z sizes to .025, under the cloud options select a noise depth of 2 and activate Hard Noise.
- This one will recreate some bumpiness and small inconsistencies in the rock
- In the third slot, add another texture
- Set the type to Clouds
- In the Colors tab, modify the colors to go from Black, 0 Alpha, to a Brown of your choosing, 0.750 Alpha. Reposition the second color to Pos 0.820
- This Texture will simulate dirt on the Canyon
- You will definitely want to do a render now. Reposition the camera and lights, and adjust render options to make for a fast render
- Go into Materials, then the textures tab and select the first Clouds texture you entered (should be 3rd on the list if you did not delete the Wood texture used earlier).
- With that selected, under the influence section, uncheck the Color, and check normal. Set the Normal value to 2.0.
- What we have just done is set the second texture not to affect color, but to affect the angle of the normal in a render. This can be used to reproduce jagged edges on flat surfaces, or waves in water
- Now, select the Marble texture again. Under the Map Input, adjust the sizeX, sizeY, and sizeZ values to 5.0.
- Change the Z size under mapping to 5.0 from the second cloud texture.
- You will want to render here, adjust the values as desired. For more layers vertically, increase the sizeZ value
- You should now have an unrealistic, but sort of rocky Canyon wall.
Lighting the cliff
- Remove all existing lights
- Creating a new light with the type of "Hemi". Center it over our cliffs, and use Scale (s) to scale it down.
- Create another light, with the type of "Sun". Position it where you want (position doesn't matter with Sun), and use Rotate (r) to position its Ray at the Angle you desire.
- In this example, the Sun was more of an evening Sun. Its light is at a 45 degree angle on one side. This creates some Canyon walls light, some dark.
- Position your camera and adjust the Energy values of your Hemi and your Sun. The Hemi will light up everything, its an easy way to give light to canyon walls that would otherwise be completely black. As a starting point, set your Hemi value at 0.4 and your Sun value at 1.5 and observe how that looks from a few angles. Make adjustments if you desire.
- Finally change for all the three textures the Mapping - Coordinates to "Generated" in stead of "UV"
Guide the camera through the canyon
The last step is to guide the camera through the canyon.
- Click on the camera in the Outliner.
- Click on Num0 and zoom a bit, then lock camera to view.
- Go to keyframe 1 and set a locrotscale keyframe.
- Click on the red dot under the Timeline, which will keyframe every movement.
- For simple keyframing set the Framerate to 8 FPS and set the End frame on "1000" then hit the play button under the Timeline.
- Now fly with shift+F through the canyon.
- After this set the frame rate back at 24 FPS and watch and see your beautiful simulation, which will possibly take too long to render.
Additional projects
- Using NASA's topographic image map at http://earthobservatory.nasa.gov/Features/BlueMarble/BlueMarble_2002.php
You have the option of selecting a small portion of your selected topographic map or you can map the entire 360x180 degree panoramic map onto a sphere. Refer to UV Mapping tutorial.
If you just select a small portion of the map of the world(cropping), note the resolution of your cropped image. Create a basic plane and do not scale it yet. Sub divide as many as required to match the resolution of your image. This is in order to get the most out of the topographic image. If you don't bother, this is not essential.
Then apply the texture. Choose texture of type "image" and do not disable this texture. NASA's topographic pictures also come in a colourful form but shaded to indicate heights. The reason why you leave the scaling to the last is that the texture is set to map onto the basic plane size of 2x2 units. If you increase this, the textures will be repeated. Adjust the strength level to a suitable level. The default 1 is too large.