Blender 3D: Noob to Pro/Bump Mapping
Bump Maps are textures that store the relative height of pixels from the viewpoint of the camera. The pixels seem to be moved in the direction of the facenormals, either in direction to or away from the camera. You may either use greyscale pictures or the intensity values of an RGB-Texture (including images).
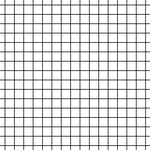 Image 1a: A texture grid for bump mapping. |
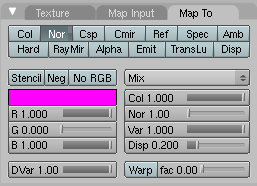 |
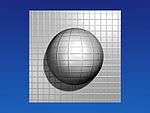 Image 1c: The texture grid applied to a sphere and to a plane. |
Bump Maps are easy to apply. They work well on flat surfaces, only to some extent on curved surfaces. On curved surfaces it is more easily noticeable that you don't create real 3D structures. The visible effect depends on factors like lighting, specularity of your material, camera angle, distance and so forth.
- Add a new texture to your object.
- Activate the Nor button in the Map To panel.
- Set the depth of the bumping with the Nor slider.
- Use the texture type Image and load your bump map.
Bump maps should contain hard transitions between black and white. A gray wedge (e.g. a linear blend texture) would be hardly visible in the rendering.
Creating Bump Maps
You can easily create Bump Maps with Blender yourself, this is especially useful if you have modeled some small details on a surface and you realize at the end that your scene will get too complex. You could also use the Bump Maps in a 2D application like Gimp or other, similar programs.
I will create an animated bump map in highest possible quality, it is not always necessary to make such an effort. The goal is to create a wave effect and make an image sequence of it, to be used as a bump map. The original object has 600.000 vertices, the object the map is applied to has 8 vertices.
Setting up the scene
- Open the default scene and remove the cube.
- Insert a plane and change to edit mode.
- Crease its edges with +1 (Shift-E).
- Subdivide multi with 11 cuts.
- Change to object mode.
- Add a SubSurf modifier with a render level of 6.
- Add a Wave modifier.
- Time Sta: -10
- Height: 0.2
- Width: 1.5
- Narrow: 1.5
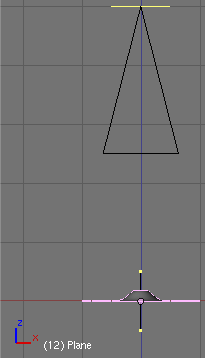
- Set the camera dead upon the plane.
- X/Y/Z: 0/0/5. You can use the Transform Properties Panel to bring the camera to a certain position, the Z-Position is important is this case.
- Set the camera lens to 80.00 (Editing Buttons->Camera Panel).
The plane should now fit exactly into the camera view.
- Save your file.
We're going to use the Z-Buffer information to create the bump texture. The Z-Buffer contains the distance from the camera, this is exactly what a bump map is. To render the Z-Buffer information as an image, we're going to use Composite nodes. To get the highest possible quality, we will use Open EXR as file format, this allows us to store the Z-Buffer information with a numerical accuracy of 32-Bit floating point, instead of a meager 8-Bit value.
Render settings
- Change to the Anim tab buttons (f10).
- Set End to 40.
- Activate Do Composite.
- Select Open EXR in the Format panel, set SizeX/Y to both 600 (square image for the square plane).
- Set the Output directory to //BumpAnim/. This creates a subdirectory to the file where the image sequence will be stored. Don't omit the slashes.
Node editor
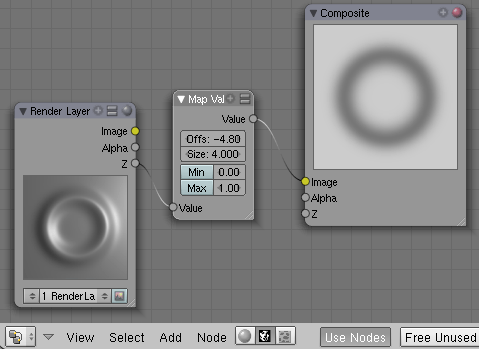
Now the setup for the composite nodes.
- Open a Node Editor window.
- Select Composite Nodes.
- Activate Use Nodes.
A Render Layer and a Composite node will be inserted automatically.
- Add->Vector->Map Value.
- Connect the Z-Output of the Render Layer to the Value input, and the Value output to the Image input of the Composite node.
If you render now the image is plain white, we have to talk a bit about the Map Value node. The Offs value is the distance from the camera where the Z-Buffer should start (in negative BU). It is not to important to get the best range, because we use OpenEXR, but if you would like to use PNG instead, you have to select this value carefully.
- Set Offs to -4.8. This is the smallest distance from the camera needed. You can measure this value if you use the Camera Clipping, or if you render and move your mouse with pressed LMB above the render window.
- Set Size to 4. The size value is a bit complicated. This is not directly the value range, instead , and .
- If you want to include the Z-Values from -4.8 up to -5.05 the range is 0.25, so Size is 4.
- If you want to include the Z-Values from -4.5 to -3.5 the range would be -1, so Size would be also -1.
- If you want to include the Z-Values from -4.5 to -5.5, the range would be 1, so Size would be 1.


- Render the animation.
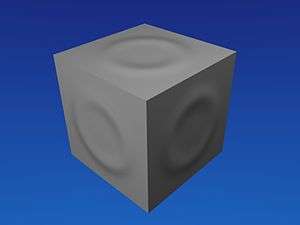
Applying the animated bump map
- Open a new file.
- Select the default cube and change to the Texture buttons.
- Use the texture type Image.
- Load the first OpenEXR-Image from the directory where you have stored the sequence.
- Activate Sequence in the Image panel, set Frames to 40.
- Change to the Material buttons.
- Activate Nor for the texture and set the Nor slider to 25 in the Map To panel.
- Set the mapping to Cube in the Map Input panel.
This is it. Pretty much the same look as with the real deformation, but using much less resources.