Blender 3D: Noob to Pro/Adding Lamps
You can quickly add several different types of lights to your blender scene
SHIFT + A → Lamp → Spot
A light will appear in the location of the 3D cursor. You can move a light just like any other object.
If you want to quickly light a scene just for illumination, not for a specific look, add four lamps around your subject. If you are interested in experimenting with a lighting arrangement, a nice quick way to experiment is to create a Monkey in the scene to test with.
SHIFT + A → Mesh → Monkey
The monkey is just as good of a test subject as a human face, so give it a try. You can throw various materials on the monkey and try different textures too. Don't bad mouth the monkey, she is really useful.
Explaining the Different Lamps
- Point: Single point light source. Provides very localized light. The shadows can be sharp, or you can set its size to something nonzero to make the shadows fuzzy. Useful for representing light sources within the scene; e.g. if there is a lightbulb or candle or something in the scene, position one of these within it to give the impression of light coming from that object.
- Sun: A light with parallel rays that will illuminate the scene with a bright even light. Because the sun is (effectively) infinitely far away, the position of this lamp does not matter, only its direction. Good to use in brightly-lit outdoor scenes (i.e. a sunny day).
- Spot: Spot lights produce light in a cone shape, and have some special features. They are the only light source that can be made visible with the 'halo' option, to simulate light in a fog. They are also the only light source that can cast buffer shadows (see below).
- Hemi: 180°-wide uniform, shadowless light source. Great for use as a fill light, or as a back light. Similar to Sun, its position does not matter, only its direction.
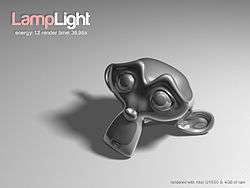
- Area: These are similar to point lamps, except that they are rectangular. As a result they can cast accurate raytraced soft shadows. These are my lamp of choice for still shots, but they take a lot of time to render.
 Light from Point |
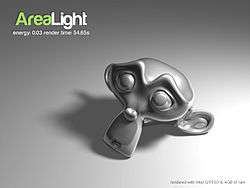 Light from Area |
 Light from Spot |
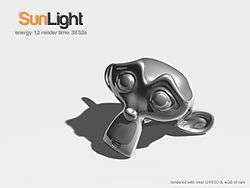 Light from Sun |
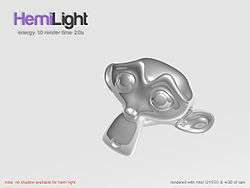 Light from Hemi |
You might want to see the adjusted scene and play around with it for awhile.
Shadow Types
There are two different kinds of shadows that lights may cast: buffered and ray-traced. The main difference is that buffered shadows are much quicker to calculate, but take more memory, and can be of lower quality without some fiddling. Also strand-rendered materials (as can be used for hair or fur) cannot cast ray shadows with the Blender Internal renderer, so you have to use buffer shadows for them so their shadows look realistic.
Only spot lamps can cast buffered shadows. Hemi lamps cannot cast shadows at all.
| Lamp Type | Buffer Shadow | Ray Shadow |
|---|---|---|
| Point | No | Yes |
| Sun | No | Yes |
| Spot | Yes | Yes |
| Hemi | No | No |
| Area | No | Yes |
Creating a basic scene with basic lighting
- This addition is simply a way to apply what you know about lights and to discover a few settings like colors or creating simple shadows. The purpose here is to create a basic scene with a sphere over a plane, nicely lighted. You should already know the basics of Blender (creating a mesh, moving and rotating it, rendering).
Creating the scene
- Okay, let's start! Open a new file. Add a UVsphere of 32 rings and 32 segments. Leave it in the center of the scene.
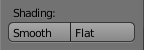
Click the Smooth button in the Tool Shelf on the left of the 3D view ( T to make it visible if it’s not) so the sphere will render as a nicely smoothed sphere.
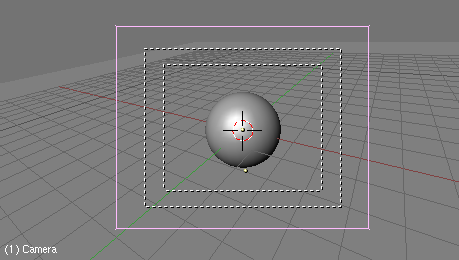
- Add a Plane, and move it just under the sphere to be the floor. Scale it so it is very big. The ideal would that we can't see borders with the camera.
- Then we will move the Camera. Grab it and rotate it so it looks at the sphere from top and a bit from the right. You can have an idea of what it sees pressing NUM0 to have a CameraView.
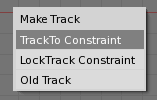
Trick : First RMB on the Camera, then SHIFT + RMB on the Sphere (the order is very important). Do a CTRL + T and select TrackTo Constraint.
The camera will be looking at the center of the sphere... You can then move either the camera or the sphere and the camera will still point at the sphere.
Adding the lights
- Okay, what we have is a pretty beautiful scene, isn't it?... Well, it isn't! But it is enough to add some lights... Here I will describe a basic lighting scene I use as a default for fast renderings. I picked it out from another tutorial, you can find the link at the end of this page.
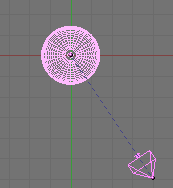
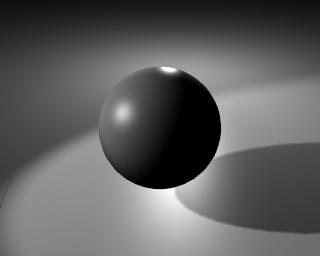
- Now we will add our so-awaited lights. SHIFT + A →Lamp→Spot. Yes, we will first use the Spot light. We can see it as a projector. This is the only light casting shadows. Place it so it is upper and on the left of the sphere. Rotate it so it looks at the Sphere (you can use a Trick I gave you before to have the light looking at the sphere).
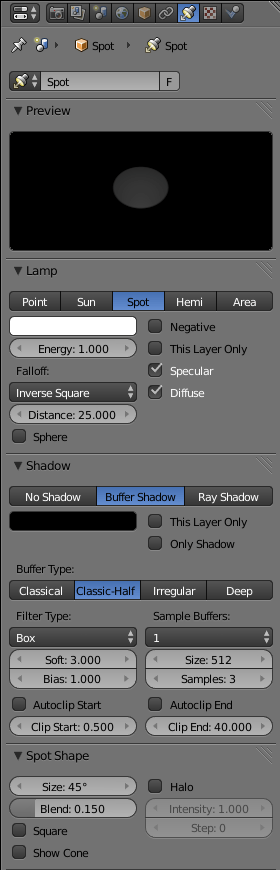
- Okay, let's see what we can tune with the spot light. Having the lamp selected, go in the Lamp settings:

You will see these buttons (right):
- Yeah, really lots of options. Don't worry, I'll explain the basic ones.
- Distance : Sets the maximum distance the light can reach. Increase it so the lighting cone really goes behind the sphere. I set it to Distance:40.
- Energy : This is the force of the light. You can leave it at Energy:1.
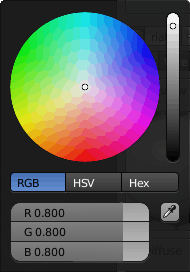
- RGB : You can change the colour of the light. Click on the colour and a little window will appear to select the colour you want. Leave it white.
- Buffer Shadow : Enables the light to cast shadows, leave it pushed.

- Only Shadow : This light only creates shadows, without casting light ( yeah quite unrealistic, but it can be useful ). Leave it unpushed.
- Spot Shape Size : This is the angle of your cone, in degrees. Leave to Size:45.
- Spot Shape Blend : This smoothes the circle cast by the light. We will smooth it so that it looks better. Set it to Blend:0.4.
- Clip Start and Clip End : This is the distance from the light between which shadows will be cast. You can see the "line of effects" in the 3D windows when you change these. Set them so the line starts before the sphere and ends far ( well, a bit ! ) behind the plane. You should obtain something like this. (this is very important... If you do this badly, it can result in completely dark scene!)
- Buffer Shadow : Enables the light to cast shadows, leave it pushed.
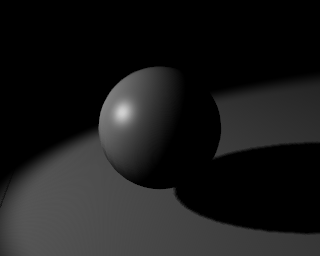
- Now, we have set our Spot light. This light will be our side light and shadowing light. You can make a fast preview pressing F12 . You can see your so nice shadow. But there isn't enough light... Let's add some more!
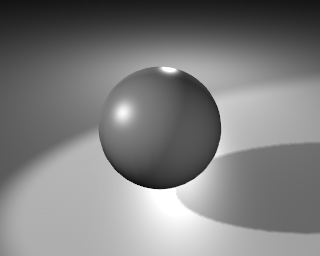
- Time to add a second light! SHIFT + A →Lamp→Point. This time, we will create a point lamp. This is like a point which emits light in every direction from that point. You should place it at the opposite of the camera, quite at the same height. This light will be used to better see the form of the sphere and to add a sort of general lighting of the scene.
- Go in the Lamp buttons, and set it to a higher energy like Energy:1.25. You can make a quick render to see how much this light is important to a scene.
- Now, we will add a second basic lamp. SHIFT + A →Lamp→Point and we will place it just behind the camera point of view, a bit moved at the opposite of the Spot light. This third light will slightly light the dark parts of the sphere.
- Decrease the energy of this light, as it is only supposed to fake the reflections of the environment. I set it to Energy:0.8. Another little trick, as this is not supposed to be a direct light, there shouldn't be a little white glow called Specular on the sphere coming from this light. Uncheck specular checkbox.
- Okay, it's time for the final rendering. Of course, this is a really basic lighting set you can use for rendering a simple mesh; but for more complicated scenes, lights can come from other places, with other colors, etc... Thus we didn't use the Sun, Hemi and Area lights, which are a bit more complicated.
Note that the following site contains nude figures:
For a more in-depth tutorial, here is a tutorial from the Blender Documentation, which has been a great source of help for me.
User note: you might want to check this tutorial on lighting: http://www.youtube.com/watch?gl=US&v=YJiR2Q7uvbQ
Outdoor lighting
- Here you will use a Sun in conjunction with a Spot light and some little Lamps.
Lighting Without Lamps
It is possible to light a scene without lamps, or with fewer lamps. In the World Context ![]() of the Properties Window, there are three options, for “Environment Lighting”, “Ambient Occlusion” and “Indirect Lighting”.
of the Properties Window, there are three options, for “Environment Lighting”, “Ambient Occlusion” and “Indirect Lighting”.
Environment Lighting adds a shadowless light that seems to come from all directions and fill all parts of the scene.
Ambient Occlusion (“AO” for short) is supposed to mimic the effect of shadows darkening corners and crevices of real-world objects (in theory this should naturally fall out of accurate lighting calculations, but it is easier to compute it separately); Blender also allows you to use AO to brighten parts of the scene outside those corners and crevices.
Indirect Lighting tries to mimic light bouncing off diffuse surfaces and illuminating other diffuse surfaces. It only works when the “Gather” option (next panel down) is set to “Approximate”.
- Ambient Occlusion Video Tutorial: http://www.youtube.com/watch?v=rKUAemD7oo4
- In older (pre-2.5) versions of Blender, there was an option called “Radiosity” (Video Tutorial), which is no longer supported.