Blender 3D: MemoBook
As you may be aware, Blender is the first and only fully integrated 3D graphics creation suite allowing modeling, animation, rendering, post-production, realtime interactive 3D, and game creation and playback with cross-platform compatibility - all in one tidy package.
This Blender MemoBook is part of my personal Memo Ssschratchhhh WikiBook. Maybe you will find it useful. You can edit it if you already have your own MemoBook, tip or proper link to add@this level! This level means that you can find this MemoBook useful after you went carefully thru Blender Interface for the very first time and you want something nice to render or animate with your Digital Studio Masterpiece - Blender! This Blender MemoBook doesn't want to be YaBt (Yet another Blender tutorial), but more like MemoBook with references to tutorial links (to support short HOWTOs) and tips which related tutorials maybe didn't include or are worth repeating. I want to keep this MemoBook as compact as possible, but still smooth and friendly enough to be read.
Also don't worry if you want to edit this MemoBook, feel free and welcome, MediaWiki has all history backed up. MediaWiki is quite easy to install. How? Read this WikiBook.
General Tips
- Here is what I found to be the Golden Rule of Blender:
- "Keep one hand on your keyboard and one on your mouse."
- Blender Manual.
- Blender Hotkeys & Useful Blender Shortcuts
- Blender Tutorial Links List
- Google is your friend. Search for blender filetypes like this: scene filetype:blend
Ok, let's do it!
I didn't work in real 3D for many years (I've used Cubicomp and Topas in my professional past) and even with all my 3D experiences using Blender doesn't look like easy task... But anyway, you will never know how to swim if you don't jump into the water, as someone said, so I'll try to make a beautiful Staunton chess set for my first Blender lesson. Hard & original task, huh? :) But before you start i would like to invite you to read beautiful writing for a new artists, To Those Learning 3D written by Glen Moyes.
Before you really start, it's a good idea to set home paths for textures, fonts, render, yfexport, python, texplugins, sounds, seqplugins, and tmp (be careful: default /tmp is deleted after reboot, it's better to set it somewhere else, like /home/blender/render). You can find this options in User Preferences: CTRL-ALT-U. I find it useful if it's MMB (middle mouse button) set to Pan View instead the default Rotate View. I also prefer Dolly rather than Continue View Zoom. After these changes you can save default scene with CTRL-U.
For the reference image I've downloaded some proper Staunton set photos from the net. You can use photos as references in Blender too, but for the Blender SVG import test I will use Inkscape for the 2D chess set render.
Staunton chess set
First I will make a pawn. Why? Heh, because it's the greatest piece! You don't believe me? Well, the pawn can be promoted to any piece except the king, can't it? So... :)
Ok, I can't say that Blender 2.35 doesn't read Inkscape SVG, but the import is not perfect yet, so it looks that I will have to wait for perfect import till some next Blender release.
I didn't want to make a 2D pawn polygon again, so I repaired the broken Inkscape SVG in Blender 2.35 version also can't read open SVG polygons which are needed for my pawn...
I used Blender basic Mesh Tool Spin, which is probably not the best option if you want to have huge number of objects made that way. For such purpose is better to use Catmull-Clark Subdivision Surfaces because of Subdivision Surfaces control, but for this very first test was ok.
Ok, I did it! Staunton Pawn is born. Not bad for the first try! I had problems with merging doubled points (Edit mode > WKEY > Merge); maybe it is better to leave them doubled. There must be easier way to delete them. I'll check this with the next piece - bishop, zebra, robot, house, or mouse. You can download chess set from here. (You can remove doubles if you select all vertices & (Edit mode > WKEY > Remove Doubles), but you need to be careful that you start to build at center SHIFT-CKEY).
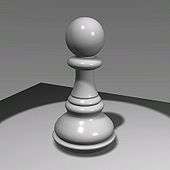 Plastic pawn |
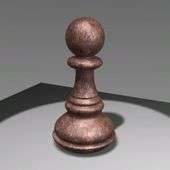 Rusty pawn |
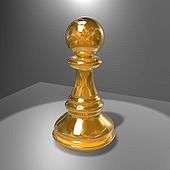 Amber pawn |
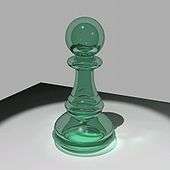 Glass pawn |
Materials
- The plastic pawn is without texture and the scene has two lights, one omni (omnidirectional) light for better ambient light and one stronger spot light which casts shadows. Shadows in this scene were made with Buf. Shadow setting (Lamp buttons) where you have good control over shadow softness.
- For the rusty pawn I've used the same scene with two lights and a rust texture map (I've made a larger tile 2400x3200 px texture in Gimp, but I found it later that is better to use power of 2 sizes for textures: 512x512, 1024x1024, 2048x2048, ... etc.) from www.mayang.com where you can find a lot of free, large & useful textures for your models. Map input setting for this rust texture is cube; settings for map to are col and nor, this stands for using colors and normals (bump mapping). This stage went without problems, but I needed a lot of experimenting with settings. I found it out that you need to rotate texture through 90 degrees in Blender if you want to have original texture position!! (Blender ver. 2.35).
- The Amber pawn is made using Subdivisions instead of SPIN command. It stands in the same scene but there is more lights and background curved plane. For this material I've used reflection mapping F5 > World buttons; F5 > Material buttons > Mirror Trans and Ramp Shader. Do you know how many lights are used for the Amber pawn?
- The Glass pawn stands in the same scene but is rendered with Yafray renderer which finally works in Blender 2.35, but still not by default(!!). For this you have to switch off the xml button Scene (F10) > Render > Yafray > xml. Results with Yafray are good, but it's a large time consumer - read slow. For Yafray rendering I needed to set different light settings to those in the previous scene because the Yafray render is much darker than the default Blender renderer. This you can correct a bit in the same menu as is xml button with Gam and Exp sliders (Gamma correction and Exposition), but probably you will need to add more energy to lights too. I set Exp to 4.0 and the spot light Energy to 5.5 (in the previous scene was 1.4 for the same lighting arrangement). This glass pawn is without texture, but I added one photon spot light from the same direction but little lower. Photon light doesn't shine as normal light but traces light photons through material refraction. You can see results on the background surface and on model itself. I set the pawn material refraction to 1.5 Shading (F5), Material buttons > Mirror Transp > IOR which is the value for glass as you can see in Material Refraction Values Table. I found good tutorials about this topic on www.blender3d.com.
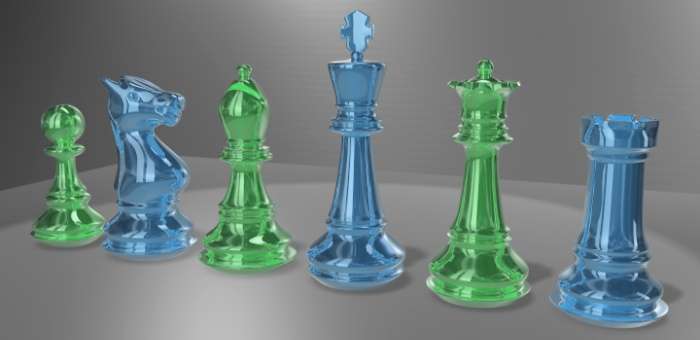
- All chess pieces were made with the same subsurface principle: Shift AKEY >> Add > Mesh > Cylinder and EKEY for extrude, but the difference is in the number of vertices. The pawn is started with 4 vertices, the knight with 8, bishop with 16, king with 8, queen with 10, and the rook with 12. Four vertices for the pawn is not enough for a rounded bottom (read about this problem here). The knight was made with the extrude function EKEY and with some tweaked vertices. I also added two additional Face Loop Cuts KKEY > Face Loop Cut for head details. The bishop was made the same way. Here I also used the knife function KKEY > Knife (Exact) for the bishop head cut. The rook could be started with 18 vertices for a better result on the parapets (the upper part of the rook). Material for this chess set was taken from amber pawn, the only change is color hue.
Cobra
Did you expect to find here Queen or Zebra? Oh no, my friend. Here is Cobra, or the so-called Shelby Cobra Blueprint which is needed to build your new Cobra 3D car model. One day I was looking for a good Cobra Car Blueprint, but I found only one with a small resolution, so I decided to draw a Cobra Blueprint in SVG format with another great 2D vector software package Inkscape. You can download the Cobra Blueprint SVG files here at Openclipart.org.
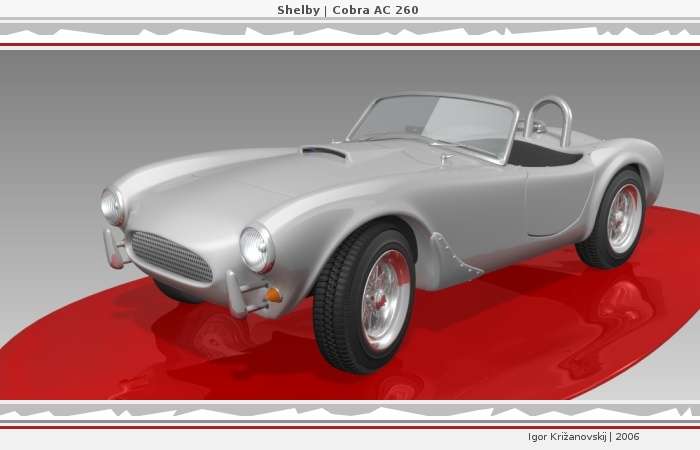
There are quite a lot of car tutorials around, but best so far that I found is a tutorial for a car made by Speedtiti (sometimes you can find him on IRC). I missed some details in his tutorial, but I think his approach to car modeling is right one. In the picture above you can see my Cobra progress so far. Perhaps as you are building your car model you will need some of these tutorials and also this, as well as one about car lights at 3dcar-gallery.com. Finally there is an excellent site with tons of blueprints online!
- Have fun with building Cobra and don't forget to make some useful entries in the Memo Book!
Face of Gilbert
The Face of Gilbert was my first try to make an organic form with Blender. I didn't use any reference pictures. The main reason for this is that almost every tutorial uses reference pictures and I wanted to see what I could do without them.
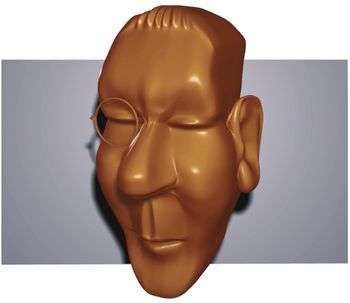
What did I learn from this exercise? Well, Blender is very strong modeling tool compared to software that I had used before (yes, that's an old book:). Catmull-Clark Subdivision Surfaces is an excellent tool for organic forms and gives you precise control over surface curves, but you have to be careful about two things: First, when you model the front side of the model you have to be careful about the back side vertices at the same time! Why? Because if you start with box modeling like I did in this exercise, you will have a flat backside full of vertices in the same plane after you finish the front side face modeling and this is rather difficult to change later. The same is true for the left and right side of the model. Only later I found a very useful Topology Guides. Second, if you want to model some exact shapes, especially rounded circles, don't start with a Box but try with a Tube or use command SPIN. Read more about this problem here. In my case it was also a good idea to control surfaces from inside of the model, especially when modeling concave slopes like ears. Thru processing I didn't delete any vertices and I've used mainly these commands for modeling: KKEY for loop cut, EKEY for extrude (in my case used only for the ear), GKEY for editing vertices and SKEY for scale (with the SKEY you also control symmetrization of vertices). You can check some tutorials for the basic idea how I've made Gilbert.
Holly smoke! I think I can fly!
The scene and material for this model are quite simple. I have used two lights: one spot and one omnidirectional. I have also included a grey-blue back plane for an additional 3D effect. Face material is made with Ramp Shaders (F5 > Ramps). I didn't care much about materials this time, but I will try SSS python script for this purpose later. This face is made with Blender 2.36 but it will be even easier to do it with the additional features in Blender's next release 2.37! Yesss!!
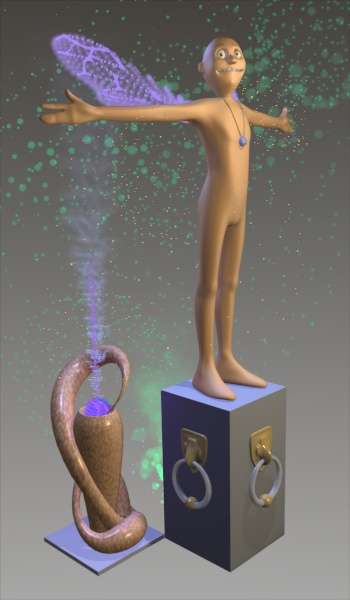
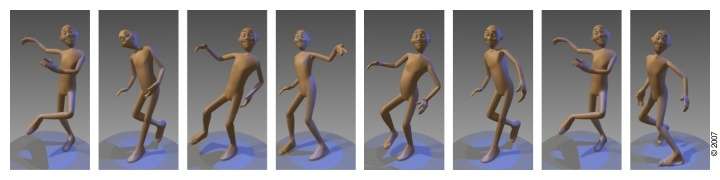
Victor the Brave
Yes, Blender 2.37a is even more enjoyable for modeling than the previous versions. At this point I can tell you for sure that Blender is really a Big Software Bundle. This also means that you will never be able to master all of Blender's finest filigree features and options unless you are hmm, God? With integrated Python there's just too many options... and there's still more and more to come!
I've made the Victor The Brave character for the purpose of learning animation, and pure fun of course! What did I learn? I found another of Blender's Modeling Golden Rules! Less is More, but Optimal is the Best! So when you model have in mind that less vertices you use, the closer to perfection you will be, but don't forget to press Optimal button from time to time (F9; Mesh; Optimal :)
I also found it out that is VERY important how you start modeling your model if you want to finish it with a good, smooth & optimal mesh (this is also important for composition). There are many ways to finish your model, but only few that are optimal. Victor the Brave (all his body parts) was started from one and only one sphere, yes sphere.
Unfortunately there is no single way to model optimally. Different models, different approaches. The Face of Gilbert was started from a box (8 vertices), but was hard for me to control the shape of the whole head. So I started to model Victor from sphere with 8x8 vertices. I'm satisfied with this result also because of the quite short render times which will be important in the next stages. On the other hand, the model of the Cobra was started from circle (not a sphere) with 8 vertices. Optimal? Did I say that my way is optimal? :) I used a tool Taper for the snake-like form. In this scene there are seven lights (one spot light) with two contrast colors (cold, warm). Materials involved experimenting with Ramp Shaders and Particle System. You can check out Steven Stahlberg's excellent tutorials. Anyway, if you still have some questions about how this works we can use this Blender MemoBook talkpage.
Well, Blender 2.4 is on its way! With a big jump! In the next Blender release we can expect a lot of great new features! First and most important for my next step in this MemoBook is new armature system. We'll be able to animate more comfortably with it. Then I have to congratulate timmeh for embedding IRC & additions in Blender. I also keenly waiting on Fluid Dynamics. On the horizon is also and interesting project Verse, which will hopefully be able to join together many, many users in one real time working team. I just have a feeling that Blender will be in every single school & elsewhere around the globe very soon.
- Orange! Where is Orange? --21:45, 1 September 2005 (UTC)
- Where is 10 years of whooshing sound?:)
- So, have a Blend fun!
Material Refraction Values Table
Useful material refraction values for material refraction settings:
|
|
|
My progress FAQ
Notice: This part also cover Blender versions 2.4+. Some functions may not work with an older Blender versions.
Basic FAQ
- How do I close a polygon?
- Select 2 vertices you want to close and press FKEY.
- How do I open closed polygon?
- One option: Select two vertices, press XKEY and choose Edge in the menu not to delete the vertices but only the edge.
- Another one: Select two vertices, make subdivide and then delete section.
- How to make a hole?
- One option: Delete face(s).
- Second option: Select face(s) and press PKEY (separate). That way you will separate face(s) from mesh.
- Third option: Select edge and press VKEY. That way you will make hole in the edge. (new feature)
- How to separate faces from a mesh?
- Select faces and press PKEY.
- How to join separated meshes?
- Select meshes and press CTRL-JKEY.
- How to join vertices?
- Select vertices and press WKEY >> Merge.
- How the heck do I edit those Bézier Curves already?
- You can add points to the curve by selecting one of the two endpoints, then holding CTRL and clicking LMB
- Curve Modes: HKEY, VKEY, SHIFT-H; CKEY (close) or Read here.
- How to move 3D cursor in center XYZ (0,0,0)?
- SHIFT-CKEY is the answer.
- How to move center of the object?
- Under Editing (press F9), Curve and surface - New Center
- How to rotate 2D polygon around one axis and make object that way?
- Draw open(!) polygon; Convert it into a mesh (press ALT-C in Object Mode); Select all vertices (press AKEY) and check on top bar for number of vertices (this is important for deleting this polygon later); Switch to top view (NUM 7) (you can't do this in other views!); Select one verticle; The cursor should be placed along the center of the polygon profile, and snapping the cursor to that location with SHIFT-S >> Cursor -> Selection.; Press SPIN button (don't forget to set 360 degrees rotation and proper steps number - around 36); Annoying part is removing double vertices: To merge (weld) two vertices together, select both of them by holding SHIFT and RMB on them. Press SKEY to start scaling and hold down CONTROL while scaling to scale the points down to 0 units in the X,Y and Z axis. LMB to complete the scaling operation and click the "Remove Doubles" button in the EditButtons window. Alternatively, you can press WKEY and select "Merge" from the appearing Menu. You can then choose in a new menu if the merged node will have to be at the center of the selected nodes or in the location of the cursor. The first choice is better in my case.
- How do I force camera to track an object?
- Select camera in object mode then hold SHIFT and select object; press CTRL-T.
- How do I un-force camera to track an object?
- Under menu Constraint (F7) press button (x) delete, (I didn't have luck with shotcut) :/
- Holy smoke, there are no shadows?!
- You will not see shadows casting by lights if you do not switch the Ray button on (Scene (F10) - Render Menu - Ray); you also have to check if you set object material to receive shadows (Shading (F5) - Shaders - Shadow) ; another option is to use Buffer Shadow, this option is very value sensitive.
- How to Redo?
- CTRL-Y. Redo. Mac users may use CMD-Y.; SHIFT-CTRL-Z. Redo. Mac users may use SHIFT-CMD-Z; You can even use ALT-U (Global Undo History List).
- How to switch to the reverse side view?
- Press CTRL + Numpad Number.
- How to align view to selected?
- Select face(s) & press SHIFT-VKEY.
- How to move faces along their normals?
- Select face(s) & press ALT-S.
- How to lock only one axis (x, y or z)?
- GKEY (or SKEY, EKEY,...) & then press SHIFT-X (or SHIFT-Y, SHIFT-Z).
- How to apply modifiers on object?
- In Object Mode press ALT-C or press button Apply in Modifiers menu.
Other FAQ
- How to append character with armatures into another scene?
- One way is to append Scene (SHIFT-F1 >> Scene) and link it together (Object Mode >>> Object >> Make Links > To Scene...).
- How do I control curvature over subsurf surface?
- In Edit Mode select vertice(s) and press SHIFT-E then drag mouse to change value (0.0 - 1.0).
- Can I get perfect circle roundness from the bottom to the top of the pawn?
- No, not if you started with mesh having less than 4 corners - try starting with SPACE >> Add Cylinder (8 vertices).
- Where is my wallet?
- Check your pocket, wallet. :)
- Can I download models and textures from this MemoBook?
- Yes, try here.
- Where can I find newest Blender builds?
- Check this site.
- Where can I find friends?
- Hmm, this depends on many factors (where you are, how old are you, etc). Try with this book.
Part II: ActionBook!!
Old & new Blender tools have a bunch of new stuff implemented since versions 2.4+. Changes and new candies in armatures, NLA, new Nodes & other powerful tools can give you amazing spectrum of new options, but watch out, also traps! In the next part of this book I'll try to cover other advanced Blender options & features in animations, nodes, composing, etc...
- Ok, let's go! Action! More tips, more tricks & traps you can find in Part II, called ActionBook! Go, Victor, go!!