Aros/User/AmigaLegacy
< Aros < UserIntroduction
AROS is meant to be an operating system compatible with AmigaOS at the SOURCE level, this way an Amiga program recompiled on AROS would gain the speedup of direct execution. The problem is that most amiga programs are available only in binary format for Motorola 68000 family, which means they can't run on x86 PC AROS directly.
Amiga Forever is an emulation for other operating system, which means that all Amiga programs can run in a virtual replica of the original hardware and OS.
What are the pros and the cons of those approaches?
AROS
PROS: - future proof: system can be freely enhanced by anyone - speed: a native application is faster than a emulated one - portability
CONS: - binaries can't run directly - you won't play Sensible Soccer and Turrican II - you've to pray your hardware is supported
AMIGA FOREVER
PROS: - you can run your software flawlessly - you can play Sensible Soccer and Turrican II
CONS: - you'll be stuck to 68K software (no future proof) - apps will run slower than if ported to AROS
As you can see, the best solution is... running Amiga Forever under AROS!
So the solution, is to run Aros on it and then use Amibridge - best of both worlds. The two together are great but you really want around a 1GHz CPU to make a really good system.
Janus-UAE can be started in one window (normal mode like you would be running UAE under Windows/Linux) or it can be run so that AmigaOS 3.l windows are displayed as if they were AROS windows (coherency).
Janus UAE
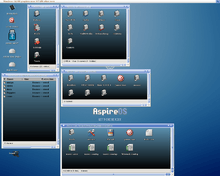
Files needed
- WB3.1 ADFs Workbench and Extras (commercial Cloanto Amiga Forever Amiga Files/Shared/) or AROS Free amiga-68k-boot replacement Roms and Workbench Disk or
Write ADF files with a single Mega Memory with TSGui, Use MFormat and ADFBlitzer from Amiga DOS, Use File2Disk. To create your own the ADF or DMS or write a ADF or DMS, normally you need to have a real AMIGA. The video to show you how to create or write an ADF, how to write an ADF floppy A600 with one meg of memory.
- ClassicWB, AIAB Amiga in a Box, AmiKit, Louise GCC hdf
- AROS m68k install (free like Aros Vision)
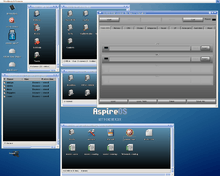
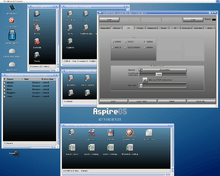
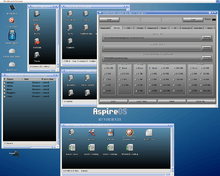
Understanding JanusUAE GUI setup
Under the Start, Stop, Reset, Quit buttons there are many tabs (some of which need to be completed straightaway and others later)
- Floppy Disks ADFs - Insert WorkBench Disk into DF0 and Extras Disk into DF1
- Memory - Insert Amiga Rom file here or in the case of AROS two files (if using Cloanto's Amiga Forever Roms insert the rom.key file at the bottom box)
- CPU - Set to 68020 or higher if using WB3.1 Set 68000 if using WB1.3 or WB2.04 version
- Hard Disks HDFs - only needed if using .hdf files - set priority to 1 so that it boots first
Press Start button above
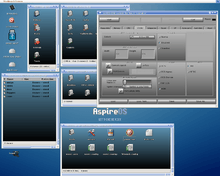
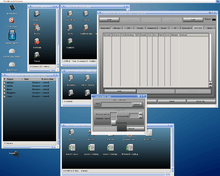
Tips and hints
Tips for better/less hassle install of Amiga Forever, I would recommend the following tweaks - at least this helped me a lot to reduce the crashes and issues:
Ctrl+Alt+Q will also quit the emulator Ctrl+Alt+R will soft reset
Ctrl+alt+f1 lets you change disk in df0 Ctrl+alt+f2 lets you change disk in df1. etc.
- Adjust your .uaerc config "manually", especially if you want to play old tracker (med) files like me. Regarding sound and CPU, I adopted the file nikolaos posted here or at the bottom of this page. I don't use the Amibridge config tool at the moment - too many freezes.
- Delete the >NIL: entry in the Workbench script like described here
- Then run the system with pre-configured GRUB line that includes the nodma option. I am not 100% sure about that, but it seems to make my system more stable, especially when it comes to my emulation issues.
- use uaequit to quit the emulation. I think I found it in an AmiKit version long ago. I add it to a "System" menu added through OS3.9 AddMenu ARexx command. There is also UAECtrl which can be found on the AmigaForever CD.
- edit the .uaerc file manually and got lots of drives. You can use the existing lines as a template on how to add additional drives.
- working just fine by copying all the OS3.5 files from the OS3.9 CD and then copying all of the OS 3.9 files from the same CD allowing it to overwrite the OS3.5 files it needed to. I then used DOpus AROS to mark all files as RWED.
the only way to improve audio performance was to remove "Idle on STOP instruction" from the CPU tab (ensure also that "Maximum" is set for the speed).
Don't try other CPUs than 68020 as they won't give you any real benefits in an emulated 68xxx CPU (AFAIK).
Then you might try reducing sound quality, channels and resolution in the "Sound" tab, of course you might get more 'fluid' playing at the cost of a worse quality.
Last... check also in the .config file for JUAE - look for the setting "sound_frequency" as by default is set to 11025 Hz. You might change it for example to CD quality 44100 - this might give a brighter sound quality
Amibridge on Icaros
You have two ways to start Amiga apps on Icaros
- the old amibridge method - just let amibridge do what it has always done without integrating workbench into AROS screen
- launch straight from Workbench - You need to start workbench in the same way as before first, this to clean amigaos' S: from the amibridge.script files.
Then
- open Sys:Prefs
- move "AmiBridge" icon to AmiStart, this will facilitate things in future
- launch AmiBridge
- start
- configure workbench to use a UAEGFX resolution EQUAL to the one of AROS
- in workbench, unpin the "backdrop" option to have workbench desktop shown in a window.
- resize wb window to include just the volume icons, snapshot window, snapshot all
- alt+tab to show JUAE panel
- go to Integration panel and enable everything
- enjoy
Works for me under Icaros 1.21 (using AmigaForever):
- run AROS in VESA 1024x768
- start AmiBridge
- in Workbench (AmigaOS) change resolution to 1024x768, disable Backdrop, make window smaller
- press Alt+Tab (returns to AROS)
- on Janus-UAE Integration tab set Coherency and Wanderer integration to Enabled
Now I can open Work partition (the one from AmigaOS), go to Software drawer, go to PPaint drawer, double-click PPaint.. and PPaint is loaded and ran on separate AROS screen.
UAE config
config_description=UAE default configuration
config_hardware=false
config_host=false
config_version=0.8.29
amiga.rom_path=PROGDIR:Roms/
amiga.floppy_path=PROGDIR:Floppies/
amiga.hardfile_path=PROGDIR:HardFiles/
amiga.savestate_path=PROGDIR:SaveStates/
amiga.cpu_idle=120
x86.use_tsc=yes
amiga.screen_type=custom
amiga.publicscreen=
amiga.use_dither=true
amiga.use_grey=false
use_gui=yes
use_debugger=false
kickstart_rom_file=PROGDIR:/amiga/KICK31.ROM
kickstart_ext_rom_file=
kickstart_key_file=
flash_file=
cart_file=
kickshifter=false
floppy0=
floppy0type=0
floppy1=
floppy1type=0
floppy2=
floppy2type=-1
floppy3=
floppy3type=-1
nr_floppies=2
floppy_speed=800
parallel_on_demand=false
serial_on_demand=false
serial_hardware_ctsrts=true
serial_direct=false
scsi=false
scsi_device=
sound_output=exact
sound_bits=16
sound_channels=stereo
sound_stereo_separation=7
sound_stereo_mixing_delay=0
sound_frequency=11025
sound_interpol=none
sound_adjust=0
sound_volume=0
sound_latency=100
comp_trustbyte=indirect
comp_trustword=indirect
comp_trustlong=indirect
comp_trustnaddr=indirect
comp_nf=true
comp_constjump=true
comp_oldsegv=false
comp_flushmode=soft
compforcesettings=false
compfpu=true
cachesize=13108
joyport0=mouse
joyport1=joy1
bsdsocket_emu=false
synchronize_clock=no
maprom=0x0
gfx_framerate=2
gfx_width=720
gfx_height=568
gfx_width_windowed=720
gfx_height_windowed=568
gfx_width_fullscreen=800
gfx_height_fullscreen=600
gfx_refreshrate=0
gfx_vsync=false
gfx_lores=false
gfx_linemode=double
gfx_correct_aspect=true
gfx_fullscreen_amiga=true
gfx_fullscreen_picasso=true
gfx_center_horizontal=none
gfx_center_vertical=simple
gfx_colour_mode=8bit
immediate_blits=true
ntsc=false
hide_cursor=true
show_leds=false
keyboard_leds=numlock:none,capslock:none,scrolllock:none
chipset=aga
collision_level=playfields
fastmem_size=8
a3000mem_size=0
z3mem_size=0
bogomem_size=0
gfxcard_size=0
chipmem_size=4
cpu_speed=real
cpu_type=68ec020/68881
cpu_compatible=false
cpu_24bit_addressing=true
cpu_cycle_exact=false
blitter_cycle_exact=false
log_illegal_mem=false
catweasel_io=0x0
catweasel_joy=no
kbd_lang=us
state_replay=no
state_replay_rate=250
state_replay_buffer=20971520
filesystem2=rw,dh0:system:Ami,0
filesystem=rw,system:Ami
input.config=0
input.joymouse_speed_analog=20
input.joymouse_speed_digital=10
input.joymouse_deadzone=33
input.joystick_deadzone=33
input.mouse_speed=100
input.autofire=10
input.1.joystick.0.disabled=0
input.1.joystick.0.axis.0=JOY1_HORIZ.0
input.1.joystick.0.axis.1=JOY1_VERT.0
input.1.joystick.0.button.0=JOY1_FIRE_BUTTON.0
input.1.joystick.0.button.1=JOY1_2ND_BUTTON.0
input.1.joystick.0.button.2=JOY1_3RD_BUTTON.0
input.1.joystick.1.disabled=1
input.1.joystick.1.axis.0=JOY2_HORIZ.0
input.1.joystick.1.axis.1=JOY2_VERT.0
input.1.joystick.1.button.0=JOY2_FIRE_BUTTON.0
input.1.joystick.1.button.1=JOY2_2ND_BUTTON.0
input.1.joystick.1.button.2=JOY2_3RD_BUTTON.0
input.1.mouse.0.disabled=0
input.1.mouse.0.axis.0=MOUSE1_HORIZ.0
input.1.mouse.0.axis.1=MOUSE1_VERT.0
input.1.mouse.0.axis.2=MOUSE1_WHEEL.0
input.1.mouse.0.button.0=JOY1_FIRE_BUTTON.0
input.1.mouse.0.button.1=JOY1_2ND_BUTTON.0
input.1.mouse.0.button.2=JOY1_3RD_BUTTON.0
input.2.joystick.0.disabled=0
input.2.joystick.0.axis.0=JOY1_HORIZ.0
input.2.joystick.0.axis.1=JOY1_VERT.0
input.2.joystick.0.button.0=JOY1_FIRE_BUTTON.0
input.2.joystick.0.button.1=JOY1_2ND_BUTTON.0
input.2.joystick.0.button.2=JOY1_3RD_BUTTON.0
input.2.joystick.1.disabled=1
input.2.joystick.1.axis.0=JOY2_HORIZ.0
input.2.joystick.1.axis.1=JOY2_VERT.0
input.2.joystick.1.button.0=JOY2_FIRE_BUTTON.0
input.2.joystick.1.button.1=JOY2_2ND_BUTTON.0
input.2.joystick.1.button.2=JOY2_3RD_BUTTON.0
input.2.mouse.0.disabled=0
input.2.mouse.0.axis.0=MOUSE1_HORIZ.0
input.2.mouse.0.axis.1=MOUSE1_VERT.0
input.2.mouse.0.axis.2=MOUSE1_WHEEL.0
input.2.mouse.0.button.0=JOY1_FIRE_BUTTON.0
input.2.mouse.0.button.1=JOY1_2ND_BUTTON.0
input.2.mouse.0.button.2=JOY1_3RD_BUTTON.0
input.3.joystick.0.disabled=0
input.3.joystick.0.axis.0=JOY1_HORIZ.0
input.3.joystick.0.axis.1=JOY1_VERT.0
input.3.joystick.0.button.0=JOY1_FIRE_BUTTON.0
input.3.joystick.0.button.1=JOY1_2ND_BUTTON.0
input.3.joystick.0.button.2=JOY1_3RD_BUTTON.0
input.3.joystick.1.disabled=1
input.3.joystick.1.axis.0=JOY2_HORIZ.0
input.3.joystick.1.axis.1=JOY2_VERT.0
input.3.joystick.1.button.0=JOY2_FIRE_BUTTON.0
input.3.joystick.1.button.1=JOY2_2ND_BUTTON.0
input.3.joystick.1.button.2=JOY2_3RD_BUTTON.0
input.3.mouse.0.disabled=0
input.3.mouse.0.axis.0=MOUSE1_HORIZ.0
input.3.mouse.0.axis.1=MOUSE1_VERT.0
input.3.mouse.0.axis.2=MOUSE1_WHEEL.0
input.3.mouse.0.button.0=JOY1_FIRE_BUTTON.0
input.3.mouse.0.button.1=JOY1_2ND_BUTTON.0
input.3.mouse.0.button.2=JOY1_3RD_BUTTON.0
input.4.joystick.0.disabled=0
input.4.joystick.0.axis.0=JOY1_HORIZ.0
input.4.joystick.0.axis.1=JOY1_VERT.0
input.4.joystick.0.button.0=JOY1_FIRE_BUTTON.0
input.4.joystick.0.button.1=JOY1_2ND_BUTTON.0
input.4.joystick.0.button.2=JOY1_3RD_BUTTON.0
input.4.joystick.1.disabled=1
input.4.joystick.1.axis.0=JOY2_HORIZ.0
input.4.joystick.1.axis.1=JOY2_VERT.0
input.4.joystick.1.button.0=JOY2_FIRE_BUTTON.0
input.4.joystick.1.button.1=JOY2_2ND_BUTTON.0
input.4.joystick.1.button.2=JOY2_3RD_BUTTON.0
input.4.mouse.0.disabled=0
input.4.mouse.0.axis.0=MOUSE1_HORIZ.0
input.4.mouse.0.axis.1=MOUSE1_VERT.0
input.4.mouse.0.axis.2=MOUSE1_WHEEL.0
input.4.mouse.0.button.0=JOY1_FIRE_BUTTON.0
input.4.mouse.0.button.1=JOY1_2ND_BUTTON.0
input.4.mouse.0.button.2=JOY1_3RD_BUTTON.0
jcoherence=false
jclipboard=false
jmouse=false
jlaunch=false
Amithlon
Hardware Support
The 'easy' way to Amithlon is to build a dedicated system based on:
- nForce2 (200 or 400) based mobo. Turn OFF the sata in the bios.
- VIA based KT-400 or KT-600 on Intel (single or dualcore) or AMD Socket A.
- Intel ?
- Memory: Buy some DDR400+ ram & overclock it!!! Seriously, this kind of emulation NEEDS fast memory. (Again you don't need more than 512mb - Amithlon won't support it without much faffing & how much does an Amiga need?)
Desktop
CPU - AMD Duron / Athlon (XP)(M) Mobo - nVidia NF2, VIA KT600 (DFI Ultra-B, Abit KV7, or similar) RAM - Some quick DDR memory (DDR500+) GFX - AGP GF4 Ti or GF5 Sound - SB 128 or !Live LAN - at worst you'll need an el-cheapo PCI card if the mobo one doesn't work. USB - It's gonna work but sadly Poseidon doesn't support Amithlon any more. TURN OFF SATA support in the BIOS! SET GRUB to support a MAX of 512mb RAM (at least until it's working)
Dedicated Amithlon
MB: Asus K8N (nForce3-250) with Sempron 2800+, 1GB ram
HD/CD-rom: ATA
Net: MB built in works!
Sound: SB Audigy PCI
Graphics: AGP (see below)
HTPC MB: Asus M2NPV-MX (nForce430) with Athlon X2 BE-2400, 1GB ram HD/CD-Rom: SATA Net: Realtek rtl8139 PCI Sound: Nope. Graphics: PCI-e (see below)
I have been spending more time messing around with Amithlon; this time on a system with a Celeron 2000, Matrox G4 450, SB Live!, and an RTL8139 ethernet adapter. Amithlon works very well on this configuration.
Mobo: DFI Ultra-B. (Abit KV7 is a great / suitable VIA-based mobo) with CPU: Athlon XP-M overclocked to 2.5gig and GPU: nVidia GeForce FX5200 or FX5500 (A full GF 4 is great too).
Processor is pentium III, 667Mhz, 256MB sdram, 40gb ide drive. VIA Motherboard is DFI CA64 T, sound viaac97.
Laptop
HP 6730b laptops that I sell and much to my surprise the boing ball bounced around a few things then rebooted into Workbench. I went to OS 3.9 install and things seemed to work until I tried to find the hard drive. The window showed CD0: , HDH0: and RAM: as well as a bunch of <ASN>, none of which is the laptop HD. SATA hard drive being an issue. The specs are 2.4 GHz Core 2 Duo, 160 GB HD, 4 GB RAM.
Accelerated Gfx
- NVidia TNT2
- NVidia GeForce SDR / DDR
- NVidia GeForce 2 / 2MX Full HW acceleration and surprisingly fast!
- NVidia GeForce 4000 / 4MX
- NVidia GeForce 3 / 3 Ti Ti200 AGP: Full HW acceleration
- Nvidia GeForce 4 Ti Ti4400 AGP: Full HW acceleration
- Nvidia GeForce FX / FX Go / PCX
- Nvidia Geforce 6150 (integrated on MB): HW-acceleration works but no rasterscroll
- Nvidia Geforce PCX 5300 PCI-e: HW-acceleration works but no rasterscroll
- Nvidia GeForce 8400GS PCI-e: HW-acceleration works but no rasterscroll
The missing rasterscroll acceleration have a very noticeable impact, it makes scrolling in a CLI-window unbearably slow (When the HW acceleration works it is lightning fast.). Not sure if this can be fixed in the kernel or does the problem lie somewhere else? It would be wonderful to have it fixed (almost as good as breaking the 1GB barrier) because it would make a lot of graphic cards usable in one single stroke!
- Matrox Millennium / G100 / G200 / G450 / G550
- ATI Radeon 7xxx
- ATI Radeon 8xxx
- ATI Radeon 9xxx
Opinion - All other cards will run in VESA VGA mode. If you are purchasing a card to use with Amithlon I strongly recommend picking a GeForce 4 Ti or GeForce FX card as these offer maximum performance and working DVI support.
Audio
Best sound option is a SB 128 or !Live - old but gold (and better than any Amiga sound card).
- More AC97 audio codecs, including the popular ALC based chips.
- ATI/AMD based controllers in the SB400, SB600 and many others.
- Audio support functions in CMI8788-Oxygen HD Audio, Creative Labs SB X-Fi Sound Blaster Live!
- Sound controllers as Emagic Audiowerk 2 sound card, Vortex 3D Digital Audio, AU8820 Vortex and AU8810, ALi M5451 and others.
Ethernet LAN
- NVidia nForce based LAN adaptors, nForce 2-3-4. MCP51 nForce 430/410/405/400, MCP55 ...
- Intel LAN chips like 82801EB/ER (ICH5/ICH5R), Intel PRO/100 like 82801E Ethernet and Intel PRO/1000 PCI-Express Gigabit Ethernet adaptors.
- Realtek 8169 Gigabit Ethernet support.
- Many 3Com based network controllers, Typhoon, 3Com Etherlink and Broadcom Gigabit Ethernet adaptors.
- Marvell Yukon 2 Gigabit Ethernet support.
- and lots more...
Booting
Now you should boot with grub/lilo and with smallird.gz. It doesn't contain internal amithlon hd but it looks for amithlon's partition on actual hard drive to boot from. If with kernel310 system didn't find your &76 partition on first boot, you can't boot with it now either. Use my kernel4 instead. You should copy kern310, kernel4 with the rest of the files to boot folder so when grub/lilo starts you can change the boot options on the fly.
kernel /amithlon/kernel4 console_level=0 init=/linuxrc root=/dev/ram0 mem=768M vga=769 ramdisk_size=2310 leavepages=5200 cachesize=65536
initrd /amithlon/smallird.gz
Let's go through those parameters...
emubox.gz init=/linuxrc console_level=4 root=/dev/ram0 initd=smallird.gz vga=769 ramdisk_size=2310 leavepages=5000. -emubox.gz: The Amithlon Kernel you're using. -init=/linuxrc: What kind of Kernel you're using. -console_level=4: How much 'debug' info 0->4 (None->Lots). -root=/dev/ram0: Where Amithlon keeps it's files - A RAM Disc. -initd=smallird.gz: The system files Amithlon is to use. -vga=769: The VESA mode Amithlon uses on boot-up.
Now it starts to get important... -ramdisk_size=2310: The size of disc required to fit all of Amithon's working files. This tends to be larger with later kernels and much larger with BIGIRD.GZ as there has to be room for the internal AmigaOS install. -leavepages=5000: Working memory needed by the Kernel itself. Again this tends to be larger for later versions.
So: If you're using Gary's 3.10 Kernel you need to make sure: -ramdisk_size=2310 -leavepages=5200 ...If booting with SMALLIRD.GZ
and: -ramdisk_size=12010 -leavepages=8200 ...If booting with BIGIRD.GZ
There are other options that may (or may not!) help get Amithlon going.
-cachesize=65536: Is always worth adding to the end of your parameters line as it gives Amithlon's 68k JIT-compiler more memory to play with - make is faster!
-mem=512M: Is useful if you're running more than 1gb of RAM as this can stop Amithlon working. In your case this shouldn't be an issue as you have 256mb but mem=256M may be worth adding just in case.
Put the following right @ the end: -video=dovesa: Can be very useful for forcing unsupported cards into VESA mode if they don't do VESA properly themselves.
-video=riva:640x480,flatpanel=1: May help get a nVidia card to do DVI with Amithlon or an unsupported nVidia card to do anything at all!
-video=radeon:640x480,dfp: Same kind of thing for ATi cards.
-video=matrox:vesa:0x11B,dfp video=dovesa: May give you dual-head support with all sorts of cards. More likely will stop Amithlon in it's tracks unless you're really using an old Matrox dual-head card.
Installing
Separate fat16 file system and the file system &76 for which you will put Amithlon
Drivers
There are two types of drivers you can use on Amithlon.
- Native Drivers (68k OS3.9 drivers) (mostly recommended if there is)
- Linux Side Kernel Drivers (Kernel Drivers) (better than nothing)
There is no written Native Drivers for your sound hardware yet. (sorry) But maybe there are Kernel Drivers for them.
Kernel modules (drivers) work just the same as they work in Linux. You specify the apporpriate module for your hardware, and you insert the module into the kernel with insmod command. (INSert MODule - PCIinsmod on Amithlon). You reach the inserted module via amithlon.device from OS3.9 side.
If you already have an pciinsmode command (without arguments) in your startup-sequence, it detects the hardware you have at startup and inserts the right modules automatically to your kernel. But if there are two hardware of the same type, modules will be inserted for both, and they will conflict. So you have to choose which one to use, and let insmod command to insert only the right one. (once a module is inserted, you have to HardReset your Computer to remove them)
Now go to your S: drawer and read the file "pcimodules". Have a detailed look at the lists. Search for your hardware. If you can find the module for Ensoniq/5880 (well I don't think you will) and make sure it is inserted. And make sure your other hardware snd-intel8x0.o is not inserted. (you can query the inserted modules with xcat command. (You will have to search and read all the readme files carefully to learn how all these are done.)
To be realistic, you don't have much choice. It is best to use the hardware that works. By this I mean, if your o/b AC97 works, use it. Or buy a secondhand Vibra128 or SBLive!. They have native drivers.
Zip Drive
Make sure your Amithlon is patched with latest patches. Contrib2 (by Bernd Meyer) includes an experimental patch for Zip drives. Obtain it, read the readmes and learn installing/using it.
Network Same issues apply with the previous posts. Learn the way Kernel drivers work. Examine the files S:Pci_modules and Devs:PciDrivers/... Look for modules that will be able to support your hardware. Once inserted succesfully, your network cards will be accessible via amithlon1_net.device. If you cannot find any appropriate modules, try obtaining a supported NIC card (eg. Realtek RTL8139). They are not so expensive and not so hard to find.
Transfer files After having a working network card, Samba will be your cure.
Additional Installs
Next to installed are... PowerPCI and OpenPCI libraries. BoingBag1, BoingBag2, BB2Contributions, AmithlonUpdate and finally copied Drivers0.90 (from Gary Collive) to the appropriate drawers.
Take a look at contrib3b, the latest Hyperion update, and if you are running an Intel chip rather than AMD make sure the PIII patch is in your SPatches directory. Do you have amithlon_update installed, or contrib3b? Take a look in contrib3b readme to make sure all the required network and sound related files are there and at the proper place (they should be at exact locations).
Look for a later version of P96. (beware the installer won't be Amithlon aware, so make sure you're only updating libs & not settlings or drivers).
Grab the rtg.lib from the latest stable WinUAE (helps with glitches if you're thinking of shooting for higher resolutions)
then Back the whole lot up! (you won't want to do that again in an hurry)
Don't forget to add some updated + extra datatypes. WarpDT's are v.good but are shareware. AK-DT's are free & some come as Amithlon-native versions. (more speeeed!)
+ Added NewBaer
+ Added LowLevel Library V41.28
+ Added RaMithlon (speeds up memory a lot! - may as well make the fastest Amiga faster)
- Updated OpenPCI v2.1 (before it was v1.2)
- Updated OpenPCI RTL8139 v1.2b4
- Added AHI v6 m68k (use the 68k archive NOT the Amithlon-native x86 version which can be a pain to get working)
- Added Amiga XL remover (it removes files and icons only used by Amiga XL, so useless under Amithlon)
- Updated the installer script (many changes) + Added rtg.lib v40.3992 (from WinUAE 1.5.0)
- First thing you should install MUI and update its libraries...
- You can replace some of your OS tools with MUI versions . For ex. MagicASL...
- Do not forget MagicMenu
- OS4 Theme and dual PNG icons are done by AFA_OS,
- DualPNG icon set is KEN's ICONS v3 (v4 is much better) (don't forget to donate Ken :-))
- PowerWindowsNG lets you drag windows off the screen, like in MSWindows.
- For totally customizable requesters don't forget to install ReqAttack
PS: Note the programs, FroggerNG, ScummVM... And don't forget that you can play Doom and Quake with very good frame rates... Most of these software can be downloaded from Aminet, for others just click links :-)
PS2: You can page a maximum of 1GB ram in ATI gfx cards. If you have NVidia it is maximum 768MB.
BB3 does not exist officially but if you Google for it you'll fine a few sites that refer to post-Hyperion patches + bug-fixes that probably won't make a huge improvement. (maybe WB a bit faster, as if you need that with Amithlon!) But, hey it's good to have all the latest stuff! (These patches can yield useful speed increases if you are using a 'real' Amiga & are stuck with AGA)
One weakness of Charlie's guide/package are the OpenPCI drivers; they're out of date. There are newer versions of OpenPCI, the 8139 driver, and powerpci library (the latter wasn't included in the archive). I was having semi-random crashing with the RTL8139 card until I upgraded.
The list goes on & on...
- Miami? Yes, it's more 'advanced' than Genesis(AmiTCP) but Genesis is MUCH faster & more reliable in my experience. DCHP? You can find patches for this on Aminet if you really want but what I did was to assign a Static IP for Amithlon in Genesis even though my network is set up for DCHP. All I did was go into the Router's prefs & set it to always assign the same IP to the Amithlon's NIC - no messing, no patches, no Miami, no conflicts - worked like a charm...
...you may then want to brave the Amiga-ports of SAMBA & SMBFS but that's a whole new story.
Now comes the fun bit, throw every eye-candy patch you can @ it & see Amithlon lap it up.
- DirOpus? Great (shame about the icon support)
- PowerIcons? Great for PNG'ness (shame about the dragged images)
- Scalos? (not as good as DirOpus but has proper PNG support - I never got this to work that well with Amithlon)
- PowerWindowsNG? Great for all-sorts (you need to be running a patched rom for it to work - how you do that in Amithlon is another story, but among the files included with my guide is a hacked version of smallird.gz that has a patched rom)
- MagicMenu? Use a nice background image & set it to semi-transparency (rude not to)
- MCP? good idea.
- ModePro?
- E-UAE?
Lots of other worthwhile patches, Speed-up patches do make a noticeable difference: 0.5% on a real '040 will be barely perceptible but the same change with an '040 running @ 1ghz + can be seen. Why not install a few emulators while you're at it? ShapeShifter under Amithlon is faster on the same hardware than any other 68k Mac emulator under any other OS. You want 3D support? That can be done to via Warp3D. (see higher up this thread)
Issues
For Intel CPUs there is a patch for Intel Pentium CPU's in one of the BoingBags. I hope you have chosen the right one as installing it.
The suspect is mostly the graphic card. Because you say it crashes when you double click OS3.9 or BoingBag installers. The first thing these installers do is to open their own Public Screens with the highest resolutions available. And you also say it works fine with another graphic card without higher resolutions.
- Did you update Picasso? If you did, you should be only updating the drivers, not the Picasso executables. Please refer Charlie's guide on this.
- Did you copy the new rtg.library from one of the latest WinUAE packages. (which is v40.3994) It helps a lot at opening higher resolutions and increases speed too. It resides in "Amiga Programs" folder in WinUAE archives and should be copied to your "SYS:Libs" drawer.
If the above two is not your cure: You mention that it works flawlessly with the internal HD image (which as I know is fine tuned by Charlie). So why don't you copy whole the files of that system to your harddrive partition and begin making your customizations from there?
Actually everything i did was just the same as you suggested. First after making amiga's partitions i copied everything from amithlon_hd to my system partition, and then i started upgrading from that point. I copied it with "copy amithlon_hd: system: all". This weekend i tried installing everything again, from scratch, all over again (hehe i am not giving up, until i make this working).
1) With Geforce2 mx/mx400-64MB I can't do anything. As when i installed it before, for the first time i tried, it crashes when i start to install OS3.9-Install (BB3.9-1). ScreenMode doesnt offer me to change modes. My workaround was to install AmithlonUpdates first (from patches folder) then i can change mode with new powerfb monitors, i change mode to 1024x768x8bit. After this, i installed OS3.9-1, then BB3.9-2, everything that should be installed. I also installed System updates again (which i installed first in the process) to make sure it wasnt overwritten by some of later installations, just in case. After everything, i can use geforce2 card, i applied settings to nvidia-1. I can test and use many of the resolutions but the only stable one is 1024x768x8bit. When i test from picasso96 for example, 16bit color mode, its displayed instantly and properly, but when i switch to it, after some time i have mouse freeze or just system crash. I also updated rtg.library. I didint installed new picasso96 cause honestly i dont know what exactly to select from the options not to ruin system. So i just copied rtg.library to picasso lib and i copied picasso96fix to my C:. I added it to my startup-sequence before loadwb, C:Picasso96Fix (not sure if its all right, thats why i am explaining my steps). Its all the same, i can't switch to 16bit mode. Monitor is Sony trinitron17" multiscan 200sx. 1024x768 is fine resolution for it, just i am stucked with color modes.
2) I also installed everything from the beginning with other card S3 Savage 4, 16MB. I can installed os3.9-1, bb3.9-2, all the updates without doing anything else. everything works fine (everything done in small resolution, default 640x480. After all the updates, i tried this card in VESA mode. I can apply settings in picasso96 to board vesa-1. But i think this video card has weak vesa support. I can use only 8bit mode, when trying to go to 16bit mode it becomes unstable, crashes and restarts.
3) Not quitting yet. I took my laptop with me to have internet connection. Cause i couldnt achieve all i wanted on P3, I installed everything on my laptop. Intel CoreDuo, 80gb sata, via chipset and video is (it sucks but it is what it is) Via Chrome9 HC IGP /128mb. Everything going fine, all, the installations and updates. I tried to run it in VESA mode, it works. And its completely stable in 16bit mode, 1024x768. 32bit mode i think doesnt work, cant tell for sure(cant remember, lots of testing for entire weekend). Its a wide screen 15.4" TFT laptop display, so this resolution looks a bit stratched on the screen. All the other modes dont work. I wanted to increase resolution but its out of my hands, and knowledge:-) Not sure if its even possible to achieve 1440x900 whats native for this display.
I would also like to report success with the AmigaSYS3 package for Amithlon. It quickly gets you to the point where you can fire up AmigaAMP to test your AHI configuration and ample opportunities to crash your system with IBrowse/networking
"Amithlon patches for linux-2.4.35.3
maybe s.o. wants to build newer amithlon kernel - with these diff
applied against linux-2.4.35.3 it shouldn't be a problem.
To apply the patch under a gnulinux system:
extract linux-2.4.35.3
cd /path/to/linux-3.4.35.3
gzip -cd /path/to/amithlon-2.4.35.3-final.diff.gz | patch -p1
done"
# Boot Internal Amithlon HDD Image - ( If your card does not play nice )
title Internal Amithlon HDD Image - Force VESA + VGA ( Naughty unsupported Cards )
root (hd0,5)
kernel /amithlon/kern310 console_level=0 init=/linuxrc root=/dev/ram0 mem=512M vga=769 ramdisk_size=12010 leavepages=8200 cachesize=65536 video=dovesa
initrd /amithlon/bigird.gz
Editing
From Charlie's guide you can download AmithlonSys.rar, extract it and take kern310, bigird and smallird from it. There is MENU.LST in Grub folder so take a look and copy kernel argument lines for both internal hdd and installos3.9 to use them in lilo. You should start with bigird, internal amithlon hdd. You have 2Gb of Ram so remove 1 gig and boot with one only. Change memory amount to mem=768 and try booting with kernel310. In this line all the files are in folder /amithlon so if your folder is different you should change it accordingly.
kernel /amithlon/kern310 console_level=4 init=/linuxrc root=/dev/ram0 mem=768M vga=769 ramdisk_size=12010 leavepages=8200 cachesize=65536
initrd /amithlon/bigird.gz
After booting you should reach the workbench. As you already have 76 partition you should have it on the desktop and format it (quickly). In tools, HDToolBox, check devices to see if the system finds your drives, hdd, cd/dvd-rom. If there is no other drives than internal_hdd then system can't mount your virtual (&76) partition due to unsupported chipset controller. Proceed to phase 2 ;-)
Once in linux (i already explained these steps before but here it is again) you should have AmithlonSys.rar somewhere on the desktop (or extracted). We need bigird.gz. Console is our primary tool.
bzip2 -d bigird.gz
(and you have bigird extracted)
sudo mkdir -p /mnt/bigird
sudo mount -t ext2 bigird /mnt/bigird -o loop
(and its mounted in /mnt/bigird)
With file explorer go there and find diskfile_haage (that's amithlon internal hd) and copy it somewhere you have access from Windows (on fat32 partition). You can also copy shape.rom to use it in WinUAE. If you don't have any fat32 partitions copy it to USB flash drive or just email the files to yourself :-)
Now in Windows, setup WinUAE. If you already have OS3.9 installed it's great, if not, you just need Worbench adf, floppy image to boot with. Add one more hard drive and that would be your &76 partition. It will appear in the list beginning with [PART]. Also add hard file and that is diskfile_haage. Boot with Workbench disk. The point is to use WinUAE to copy internal_hd content to &76 (virtual partition). Use HDToolBox to format the partitions (add additional partitions), make it bootable, etc.
copy amithlon_hd: name~of~your~partition: all
That's it. If you followed Charlie's guide you can here change FileSystem type, etc.
Amithlon is sometimes a painful job when it comes to installing. Here is a quick howto besides Charlie's beautiful guide. It can be handy if original or gary's kernel don't work for you and my kernel doesn't support bigird booting (internal disk image mouting) simply due to kernel architecture, ramfs conflict. No big deal, here is a workaround.
Probably you can do these first steps in windoze, i am using linux. Any linux live distro will do, just to extract what we need then you don't need it any more.
-To extract bigird.gz place it somewhere on your hdd so you can access it later from linux; or just copy it to usb flash.
-Once in linux copy it somewhere, on the desktop for example. For a little less experienced users, i will show you how to do it under ubuntu. Default user is 'ubuntu' and default home folder in livecd is 'home/ubuntu/' So bigird.gz is placed on desktop. Launch terminal.
Code:
cd /home/ubuntu/Desktop gunzip -d bigird.gz
it's extracted. Lets mount it.
Code:
sudo mkdir -p /mnt/bigird sudo mount -t ext2 bigird /mnt/bigird -o loop
it's mounted.
Now fire up file explorer, go to file system, /mnt/bigird and find diskfile_haage. Copy it to your fat32 partition, or usb flash, so you can use it later in WinUAE.
Now it's all pretty easy. You need a partition (as in Charlie's guide) with id &76.. You can set it up in linux as well, with fdisk, id should be 76. In already configured WinUAE you can simply add real partition from your hdd and also diskfile_haage as a hard disk image as additional partitions. Pretty straightforward from now on. Initialize, format virtual (even full format works), copy everything from amithlon_hd to your hdd, set it all up, tune up the bootloader and you're ready to go.
Change memory amount to mem=768 and try booting with kernel310. In this line all the files are in folder /amithlon so if your folder is different you should change it accordingly.
kernel /amithlon/kern310 console_level=4 init=/linuxrc root=/dev/ram0 mem=768M vga=769 ramdisk_size=12010 leavepages=8200 cachesize=65536
initrd /amithlon/bigird.gz
After booting you should reach the workbench. As you already have 76 partition you should have it on the dekstop and format it (quickly). In tools, HDToolBox, check devices to see if the system finds your drives, hdd, cd/dvd-rom. If there is no other drives than internal_hdd then system can't mount your virtual (&76) partition due to unsupported chipset controller. Proceed to phase 2 ;-)
Once in linux (i already explained these steps before but here it is again) you should have AmithlonSys.rar somewhere on the desktop (or extracted). We need bigird.gz. Console is our primary tool.
bzip2 -d bigird.gz
(and you have bigird extracted)
sudo mkdir -p /mnt/bigird
sudo mount -t ext2 bigird /mnt/bigird -o loop
(and its mounted in /mnt/bigird)
With file explorer go there and find diskfile_haage (that's amithlon internal hd) and copy it somewhere you have access from Windows (on fat32 partition). You can also copy shape.rom to use it in WinUAE. If you don't have any fat32 partitions copy it to USB flash drive or just email the files to yourself :-)
Now in Windows, setup WinUAE. If you already have OS3.9 installed it's great, if not, you just need Worbench adf, floppy image to boot with. Add one more hard drive and that would be your &76 partition. It will appear in the list beginning with [PART]. Also add hard file and that is diskfile_haage. Boot with Workbench disk. The point is to use WinUAE to copy internal_hd content to &76 (virtual partition). Use HDToolBox to format the partitions (add additional partitions), make it bootable, etc.
copy amithlon_hd: name~of~your~partition: all
That's it. If you followed Charlie's guide you can here change FileSystem type, etc.
Now you should boot with grub/lilo and with smallird.gz. It doesn't contain internal amithlon hd but it looks for amithlon's partition on actual hard drive to boot from. If with kernel310 system didn't find your &76 partition on first boot, you can't boot with it now either. Use my kernel4 instead. You should copy kern310, kernel4 with the rest of the files to boot folder so when grub/lilo starts you can change the boot options on the fly.
kernel /amithlon/kernel4 console_level=0 init=/linuxrc root=/dev/ram0 mem=768M vga=769 ramdisk_size=2310 leavepages=5200 cachesize=65536
initrd /amithlon/smallird.gz
For developers
Linux source is included. If you want to start working on the kernel, add new drivers or just compile your own kernel, optimized for your hardware only (my optimized kernel boots in 5 secs.), linux source is here. GCC required to compile this (the latest 2.4 kernel) should be kept up to 3.3.x. (gcc 3.4 also has problems to cleanly compile it). I recommend using gcc 3.2.3 for perfectly clean compiling (2.95.3 is also fine). If you have problems setting up build environment (i used ubuntu 9.10) you can send me an email and i will try make a howto set it all up, build older gcc on newer ubuntu distro.
kernel4 init=/linuxrc console_level=0 root=/dev/ram1 initrd=smallird.gz vga=769 ramdisk_size=2310 leavepages=6200