Arimaa/Playing The Game
< ArimaaUnderstanding gameplay
Arimaa, like chess, is played on an 8×8 square board. The two players, Gold and Silver, control sixteen pieces each: one elephant (![]() ), one camel (
), one camel (![]() ), two horses (
), two horses (![]() ), two dogs (
), two dogs (![]() ), two cats (
), two cats (![]() ), and eight rabbits (
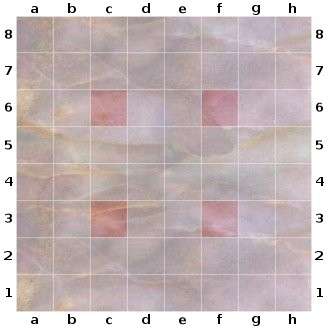
), and eight rabbits (![]() ), in descending order of strength. If Arimaa is played using a chess set, the pieces may be represented by the king, queen, knights, bishops, rooks, and pawns respectively. Unlike their chess counterparts, however, Arimaa pieces move only in cardinal directions, and must all step from square to square. The relative strength of each piece lies in its power to push, pull, or immobilize weaker enemy pieces. Four squares of the game-board are distinguished as trap squares, on which a piece can potentially be lost—these are the squares designated as c3, f3, c6, and f6 when classified by rank and file.
), in descending order of strength. If Arimaa is played using a chess set, the pieces may be represented by the king, queen, knights, bishops, rooks, and pawns respectively. Unlike their chess counterparts, however, Arimaa pieces move only in cardinal directions, and must all step from square to square. The relative strength of each piece lies in its power to push, pull, or immobilize weaker enemy pieces. Four squares of the game-board are distinguished as trap squares, on which a piece can potentially be lost—these are the squares designated as c3, f3, c6, and f6 when classified by rank and file.
| |||||||||||||||||||||||||||||||||||||||||||||||||||||||||||||||||||||||||
| The players begin by setting up their pieces however they choose on their home rows. Highlighted are the four trap squares. | |||||||||||||||||||||||||||||||||||||||||||||||||||||||||||||||||||||||||
| |||||||||||||||||||||||||||||||||||||||||||||||||||||||||||||||||||||||||
The game begins with an empty board. Gold arranges their pieces on the first and second ranks, in whatever configuration they choose—Arimaa pieces do not have fixed starting positions. Silver then arranges their pieces on the seventh and eighth ranks. The diagram at right shows opening setups which are fairly common.
Once the pieces are on the board, Gold and Silver alternate turns, starting with Gold. A turn consists of one to four steps—each player is allowed four steps per turn and must take at least one, but can choose to pass on any of the rest. The steps of a turn can be distributed however the player chooses—four different pieces can each take one step, one piece can take four steps, two pieces can each take two steps, etc. A turn must make a net change to the position—one may not, for example, simply take one step left and one step right with the same piece, effectively passing the turn. A player who has ended two different turns on an identical position may not end another turn with that same position, no matter how far apart the turns are. As a further safeguard against indefinite loops of pieces moving back and forth, rabbits are prohibited from retreating homeward. Elephants, camels, horses, dogs, and cats may each step left, right, forward, or backward; rabbits may only step left, right, or forward.
The objective of the game is to move any rabbit of one's own color onto the home rank of the opponent. Thus Gold wins by moving a gold rabbit to the eighth rank, and Silver wins by moving a silver rabbit to the first rank. It is no easy task, however, to get a rabbit past an opposing army of stronger pieces—a player must out-maneuver the other army while at the same time keeping all enemy rabbits at bay.
The second diagram, portraying a position which could occur later in a game, helps illustrate the remaining rules of movement.
A piece can pull or push a weaker enemy piece which is next to it, provided there is an empty square allowing for the necessary movement. To pull, a piece steps onto an adjacent empty square and drags the weaker enemy piece onto the square from which it came. The silver elephant on d5 could step east, west, or south and pull the gold horse from d6 to d5. To push, the weaker enemy piece is moved onto an adjacent empty square, and the piece which pushed it moves onto the square it had occupied. The gold elephant on d3 could push the silver rabbit on d2 to e2 and then occupy d2. Note that the rabbit on d2 can't be pushed to d1, c2, or d3, because those squares are already occupied. Remember also that a piece can only push or pull a weaker enemy piece—for example, a dog may dislodge an enemy rabbit or cat, but not a dog, horse, camel, or elephant. A push or pull uses two steps, since two pieces are moved. Although a rabbit may not retreat toward its home row, it can nonetheless be pushed or pulled in that direction. For example, the gold rabbit on g3 could not itself step back to g2, but the silver horse could take a step right and then pull it down.
A piece may not push and pull simultaneously—for example, the gold elephant on d3 could not push the silver rabbit from d2 to e2 and at the same time pull the other silver rabbit from c3 to d3.
A piece which is adjacent (in any cardinal direction) to a stronger enemy piece is frozen, unless it is also adjacent to a friendly piece. A piece which is frozen may not be moved by its owner, but may still be pushed or pulled by the opponent. The silver rabbit on a7 is frozen, but the one on d2 is able to move because it is next to another silver piece. Similarly the gold rabbit on b7 is frozen, but the gold cat on c1 is not. The dogs on a6 and b6 do not freeze each other, as they are of equal strength. An elephant cannot be frozen per se, just as it cannot be pushed or pulled since there is nothing stronger. However, if enough enemy pieces are utilized against it, an elephant can be blockaded so that it has nowhere to go—this is possible because only one piece can be pushed at a time, regardless of relative strength.
A frozen piece can freeze another still weaker piece just as it would otherwise. The silver elephant on d5 freezes the gold horse on d6, which itself freezes the silver rabbit on e6.
A piece which enters a trap square is removed from the game unless there is a friendly piece adjacent to the square. The silver elephant could capture the gold horse by pushing it from d6 to c6. The silver rabbit on c3 is still alive because of the silver rabbit on c4 as well as the silver horse on c2—however, if the silver pieces protecting the c3 trap were to leave their positions, either voluntarily or by being dislodged, the silver rabbit on c3 would be lost.
Note that a piece may voluntarily step into a trap square, even if it is lost thereby. The second step of a pulling maneuver may be completed, even if the piece doing the pulling is captured on the first step. For example, Silver to move could step the silver horse from f2 to f3, which would be suicide for the horse, and still pull the gold rabbit from f1 to f2 as part of the horse's move.
In the diagrammed position, if it were Gold's turn to move, Gold could win in three steps: The dog on a6 can push the enemy rabbit from a7 to a8. Now on a7, the gold dog unfreezes its own rabbit on b7, which can then step to b8 for the victory.
Note that an adjacent friendly piece does not protect against pulling or pushing. For example, on Silver's turn, their horse on c2 could push the gold cat from c1 to b1, or pull it to c2, even though the gold cat has a friendly piece next to it on d1.
Although most games conclude with a rabbit reaching goal, there are two other circumstances which can bring about an end.
- Complete immobilization. If upon their turn a player has no legal move available, that player loses.
- Loss of all rabbits. A player can win by capturing the last remaining enemy rabbit, even if they sacrifice their own last rabbit in the same turn.
Finally, if an enemy piece dislodges a rabbit onto its goal line and dislodges it off within the same turn, the game continues.
Setting up
Gold arranges their pieces on the first and second ranks, and then Silver arranges their pieces on the seventh and eighth ranks. The finer points of initial piece placement will be explored later, but for now you just want a setup that gives you flexibility and denies the opponent an easy attack plan. Most or all rabbits should start in the back row— the strong pieces must take the lead in clearing a path for a rabbit to goal. Moreover, rabbits cannot retreat homeward, and thus could quickly be pulled up and captured if they began exposed.
| |||||||||||||||||||||||||||||||||||||||||||||||||||||||||||||||||||||||||
| Gold has used the 99of9 setup; Silver has switched the dogs and cats. | |||||||||||||||||||||||||||||||||||||||||||||||||||||||||||||||||||||||||
The 99of9 setup is optimal for beginners. In the diagram at right, Gold has chosen the classic 99of9 setup. The elephant is placed in the center so that it can quickly attack any part of the board. The camel is placed in the center as well, so that it can easily go to either wing depending on Silver's setup.
The gold horses will quickly move up, to assert control of Gold's home traps and then perhaps to attack Silver's traps. A rabbit is placed forward on each flank, because a2 and h2 tend to be safer places for rabbits than the centralized d1 and e1 would be.
Beginning back and center, the gold dogs will soon move up. As long as the gold cats remain behind the traps, they make it hard for Silver to capture a gold camel, horse, or dog in Gold's own home trap.
Since Silver goes second, they can take Gold's setup into account when deciding on their own. At right, note that the silver elephant is not placed directly opposite the gold elephant. If the silver elephant directly faced its gold counterpart, Gold could advance their elephant four squares and temporarily fence in the silver elephant. Silver has used a variation of the 99of9 setup, switching the dogs and cats. Gold has chosen "cats behind the traps, dogs back", while Silver has used "dogs behind the traps, cats back". The strategic difference is subtle. Silver's dogs are guarding their home traps, and thus are potentially vulnerable to capture themselves—Silver stands to lose a dog in the opening if he's not careful. If they are careful, however, the dogs strengthen Silver's control of their home traps, since dogs cannot be pushed aside by enemy dogs.
You may wonder why rabbits do not begin behind the home traps. Experienced players who like to start aggressively will sometimes do this, but the downside is that a rabbit could be pushed or pulled into a protected trap and then wouldn't be able to step back, creating a mess for the home defender. Anyone who wants to maintain flexibility should keep a dog or cat behind each home trap until it has a better use elsewhere.