Arimaa/Introduction to Strategy/Elephant Blockade
< Arimaa < Introduction to StrategyStrongest free piece revisited
| |||||||||||||||||||||||||||||||||||||||||||||||||||||||||||||||||||||||||
| The silver elephant has no legal move, so the gold elephant is the strongest free piece. | |||||||||||||||||||||||||||||||||||||||||||||||||||||||||||||||||||||||||
Not long after discovering the camel hostage strategy, human players accidentally discovered that some computer programs could be lured into an elephant blockade by the offer of a free piece for capture. Much later it was further discovered that the program may squirm to try to free its elephant, and in the process get jammed all the way against an edge of the board.
In this game, diagrammed at right, Gold has lost a cat while Silver has a full army, but Silver is nonetheless completely lost. Not only is there no empty square for the silver elephant to step into, there is no empty square into which it can push its tormentors. The gold elephant and camel will keep an eye on the silver camel and horses respectively. Gold can ward off any attempts to break the silver elephant out of its prison, while herding silver pieces at will into the f3 trap. This is a much more decisive advantage than a camel hostage. Silver has no plausible lines of play in this case.
Rotation
Most elephant blockades, however, are not as hugely advantageous as that one. It is a rare opponent who will voluntarily move his elephant to the edge of the board when a blockade is looming. The diagram below left, from this game, shows a slightly less advantageous situation with the blockaded elephant one square away from the edge of the board.
| |||||||||||||||||||||||||||||||||||||||||||||||||||||||||||||||||||||||||
| The gold elephant is blockaded, but the game is not over. | |||||||||||||||||||||||||||||||||||||||||||||||||||||||||||||||||||||||||
Here the gold elephant can't move, true, but nine silver pieces are required to maintain the blockade, including both the silver elephant and camel. Indeed, if all the pieces involved in the blockade stayed put, the strongest free piece would actually be the gold camel.
As it happens, however, Silver can undertake a rotation (or replacement) of the pieces participating in the blockade. When it comes to being in the way, a weak piece serves just as well as a strong one. Silver to move can free his camel for duty in only four steps, while maintaining the blockade: camel h6 south, rabbit h7 south, rabbit h8 south, and rabbit g8 east. The gold elephant can't make use of g8 to dig its way to freedom without getting smothered against the edge, so Silver can fill in that hole next move. Thus Silver needs only one turn to equal Gold for having the strongest free piece.
Furthermore, if Gold plays passively, Silver can continue to rotate pieces, freeing his elephant as well in two or three more turns. Because of this threat, it is very important that Gold not remain passive. Gold must immediately begin preparing a rescue mission to erode the blockade from the side, or even from the front if the silver elephant tries to leave. This will necessarily expose gold pieces to danger, but at least it puts some play into the position. For Gold to hang back is to await execution.
Note that even if Silver manages to rotate the elephant out of the blockade, it will require a few more pieces to maintain than a blockade on the edge. Furthermore those pieces will protrude one square further, making them slightly easier targets for would-be blockade busters. Still, the blockade is quite advantageous to Silver.
| |||||||||||||||||||||||||||||||||||||||||||||||||||||||||||||||||||||||||
| Silver has blockaded the gold elephant, but would gladly give up the blockade to take the Gold camel hostage. | |||||||||||||||||||||||||||||||||||||||||||||||||||||||||||||||||||||||||
When rotation is impossible
The diagram at right, from this game in the 2006 Arimaa World Championship, features an elephant blockaded one step further from the edge of the board, which is correspondingly less advantageous. Indeed, it is no longer realistic for Silver to expect to be able to free his elephant by rotating blockaders appropriately. True, the f6 trap is participating in the blockade at the moment, but Gold might bring a piece to f5 or e6, allowing the gold elephant to step to freedom, so Silver must soon occupy at least the latter squares.
An elephantless blockade would require silver pieces on g8, f7, g7, h7, e6, h6, f5, g5, h5, and g4. Not only are ten pieces necessary, but the bubble of blockaders also presents a large surface area for Gold to assail, extending within two steps of Gold's home trap at f3. Silver would be too busy warding off threats to the blockade to ever start capturing pieces with his freed elephant.
Since Silver can't rotate his elephant out of this blockade in practice, it does not give him the strongest free piece like an ideal blockade does. Yet the blockade is not worthless. Its value is that, although both Gold and Silver have a free camel, the silver camel is more free.
Suppose that Silver, while maintaining the blockade, were to use his camel to attack the c3 trap. Gold could defend c3 with his own camel, but couldn't endanger the attacking silver camel. In contrast, if Gold were to attack c6 with his camel, Silver would have the option of giving up the blockade to cross wings and take the gold camel hostage. (This principle recurs again and again in the study of elephant mobility.)
This difference of freedom pegs the value of the blockade to Silver at somewhat less than a camel hostage. Silver certainly can't expect to get more out of the position, because if Gold is willing to give up his camel as a hostage, he can frustrate anything else Silver might undertake. Indeed, the gold camel can probably break the blockade at any time if it is willing to expose itself. On the other hand, Silver can't necessarily force Gold to expose his camel. Gold can play in the west as well as hovering in the east making threats to break the blockade. If Silver has trouble generating a threat in the west while maintaining the blockade in the east, he may be forced to give up the blockade for an advantage smaller than a camel hostage.
Partial blockades
| |||||||||||||||||||||||||||||||||||||||||||||||||||||||||||||||||||||||||
| A partial elephant blockade makes the gold camel the strongest free piece. | |||||||||||||||||||||||||||||||||||||||||||||||||||||||||||||||||||||||||
Because of the difficulty of blockading an elephant in the centre of the board, complete elephant blockades are uncommon in games between strong players. Partial blockades, keeping the elephant from accessing an important area of the board, are more frequent. In this position (see game), Silver has a horse hostage, which ideally would make the silver elephant the strongest free piece. In this case, however, the elephant is blockaded away from the centre of the board; the strongest free piece is in fact the gold camel. Note that the blockade is not complete: the elephant can escape through the c6 trap. This maneuver would take several moves, allowing the gold camel to capture a piece in the meantime. Furthermore, it would disrupt Silver's defense of c6, probably allowing Gold to share control of the trap.
| |||||||||||||||||||||||||||||||||||||||||||||||||||||||||||||||||||||||||
| The gold elephant is cut off from the center. | |||||||||||||||||||||||||||||||||||||||||||||||||||||||||||||||||||||||||
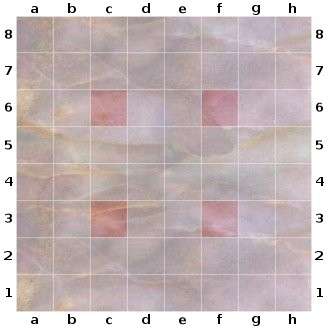
The Center
A more subtle, positional aspect to elephant mobility is the ability of the elephant to access the areas of most importance at the current stage of the game. From the centre four squares of the board the elephant has access to all four traps, so as a general rule it is better for the elephant to be centrally located. Also, a centralized elephant is almost impossible to blockade. On the other hand, in order to attack or defend a trap, an elephant must decentralize itself at least to one of the eight squares in the ring around the center, and perhaps further if it is hunting down a fleeing piece. The possibilities available to an elephant in the center usually remain mere possibilities until the elephant leaves the center to pursue one of them.
It is occasionally possible to station a clump of friendly pieces in the center of the board, which can cut off the opposing elephant's ability to switch wings at will. In the diagram at right, from this game, Gold is losing because the gold elephant can't access the f3 trap.
This strategy must be used with great caution, however, because if the opponent is able to erode the dividing wall, there will probably not be time to retreat all of the participating pieces to safety. At right, if the gold elephant could break through the wall, some silver piece would likely perish in f3. In general, pieces other than the elephant should stay out of the center. It is asking for trouble to give the opposing elephant a target in the center where that elephant wants to be anyway.